HP-54542A 500MHz 2Gs/s oscilloscope onboarding | |||||||||||||||||||||||||||||||||
 First boot of the 54542A: things look good... Another day, another auction score... You know the drill... This time it's a Hewlett-Packard HP-54542A oscilloscope in all it's green CRT glory. None of that color LCD rubbish! :-) Although it's definitely from another era, this scope has serious specs: 500MHz bandwidth, 4 channels, and 2Gsamples/s for each channel. That's right: you can run 4 channels at the full 2Gs/s each simultaneously! Dave Jones of EEVblog fame did a video about the little brother of the scope, the 54616B, which has the same classic package as the 54600B and also runs at 500MHz. In fact it shares the same front-end, including the fragile (but awesome) hybrids! However it only has 2 channels and 5k of memory per channel, while this 54542A has 4 channels and 32k of memory per channel. The 54542A also has tons of more advanced features, including split-screen display, FFT, advanced math, super advanced triggering (it's close to a 4-channel logic analyzer) and much more. Altogether a serious beast, though a bit more complex to use than the 546xx series. Top tip: get the 54522 or the 54542, in A (CRT) or C (color LCD) dress, for those are the models with non-shared, full 2GS/s front-ends. Best of all, while the prices of the 54616 have shot up due to the EEVblog video, the 54542A is relatively unknown and you can get it for much less! This auction score is in fact the best deal I ever got: adjusted for inflation I paid 1/400th of the new price. I'll let you do the math. And by the way, this scope is still fairly decent by today's standards: you'd have to pay around 12 to 15000 doll hairs to get something with the same bandwidth and sampling rate. The back panel of this 54542A is very clean, always a good sign. Anyway, let's have a closer look at the Beast... First off it's very clean front and back, always a good sign. No rust, no big stains or scratches. This device was well cared for. Then we have the obligatory self test and self calibration checks. All good! This is now turning into a really good deal: 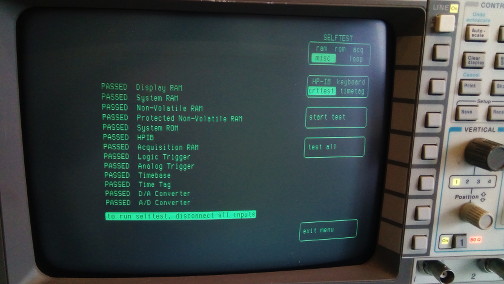 All-passed first self test  All-good calibration status Unfortunately the scope did not come with its probes, and at 500MHz each probe would cost more than what I paid for the scope itself! A problem that I will have to solve in the future... The top pouch (very clean too BTW) does not contain probes, but it does contain a sealed plastic bag with a firmware update disk. I wanted to keep that sealed just for fun, but unfortunately I had no 3.5'' floppy to do the firmware upgrade, so I have to open it to use this one. Doing so I am greeted by a whiff of 100% 90s electronics smell. NICE! :-) Plus, a very cool HP-branded floppy which will give you instant street creds when left nonchalantly in your scope:  Just plain cool, though not maybe Curious-Marc-levels of cool. I need to work on that... Here are some extra images of the pouch and disk: 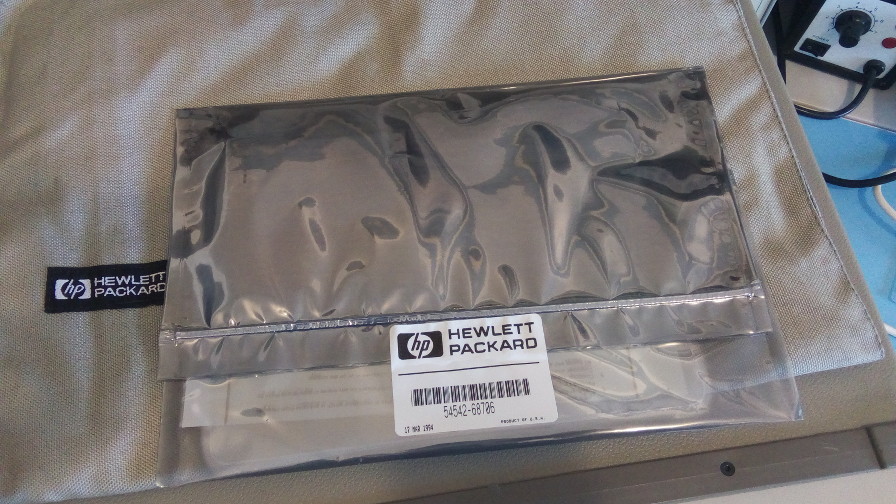
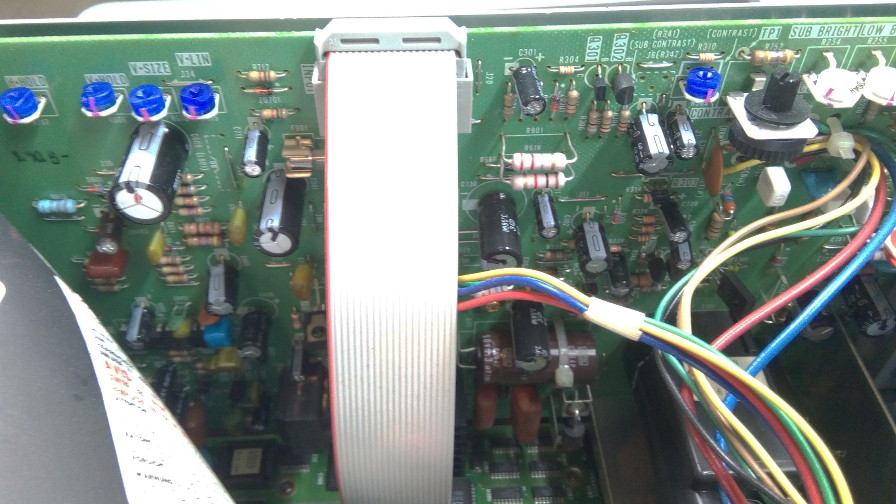
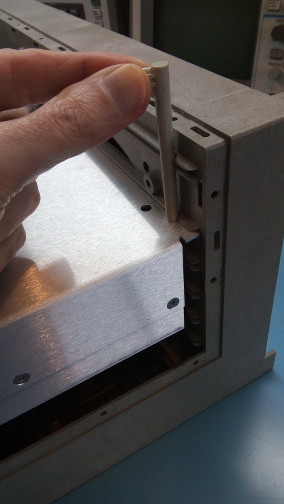
Unfortunately the firmware disk is just the same version as what is in the scope at the moment, so I have no problem erasing and reusing it to update it to the latest version. 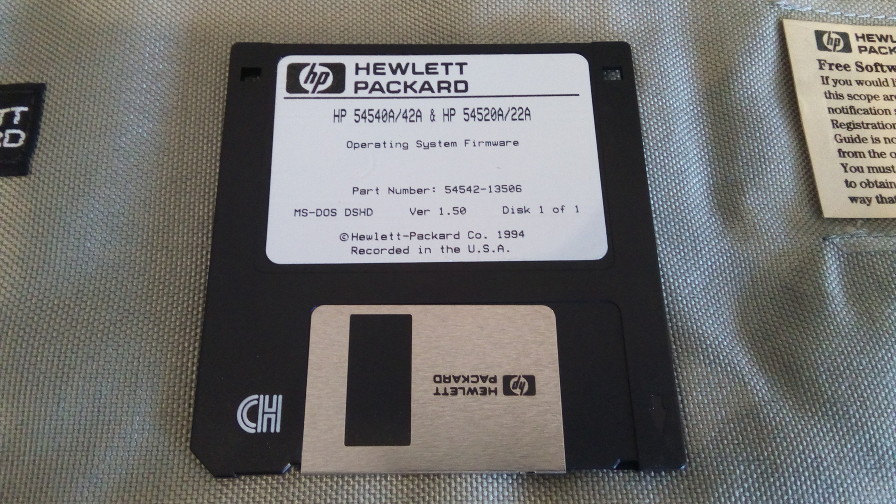  Same version, I wonder why the disc was supplied with the scope. Now that all the external checks have been made (I also verified the calibration signal outputs), let's crack that thing open... It's a bit more involved than expected, at least compared to the 53310A Modulation Domain Analyzer. Remove the 4 feet in the back, remove the handle on the side, detach the front trim piece (7 screws, 5 back and 2 silver, the latter ones for the bottom. Kudos to HP for color-coding their screws!) Removing the trim piece around the front panel is a bit nerve-racking as it seems ready to break at any moment. Don't worry: it'll be worse when it'll be time to put it back on! Anyway, the cover can now slide back. Almost. See, the top pouch is screwed to the cover, and the screws protrude a little inside, preventing the cover from slide back smoothly. Either remove the top pouch, or pull the top of the cover a little to provide space for the pouch screws to clear the rear panel. 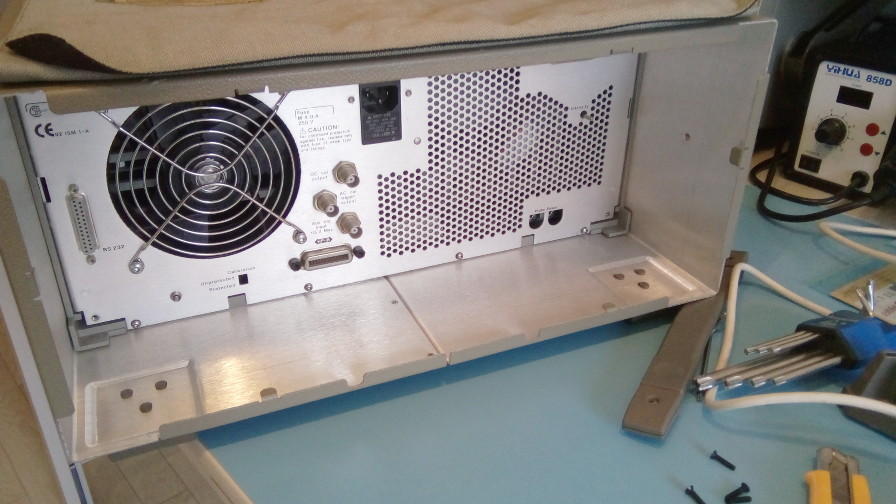 Not the smoothest operation, but works fine in the end. Inside the instrument is very, very clean. If it wasn't for the faintest CRT burn mark I would think that this scope was never used. Even the high voltage section of the CRT is spotless and shows no signs of dust. And it's not that the seller cleaned it up either, because sticky micro-dust would still be there. Impressive. Seeing this spotless interior makes me think that maybe this scope was bought by a university lab with too much hardware budget that had to be spent, and little actual use of such a beast. A common thing in Japan where even small labs in small universities can have an impressive array of nearly-unused hardware. I won't complain: good deal for me! While the device is open it's also a good idea to adjust the CRT; there's good instructions in the service manual. One disadvantage of the 54542A is the brightness knob located in the back. Another hack for another day will be to move it in the front panel. 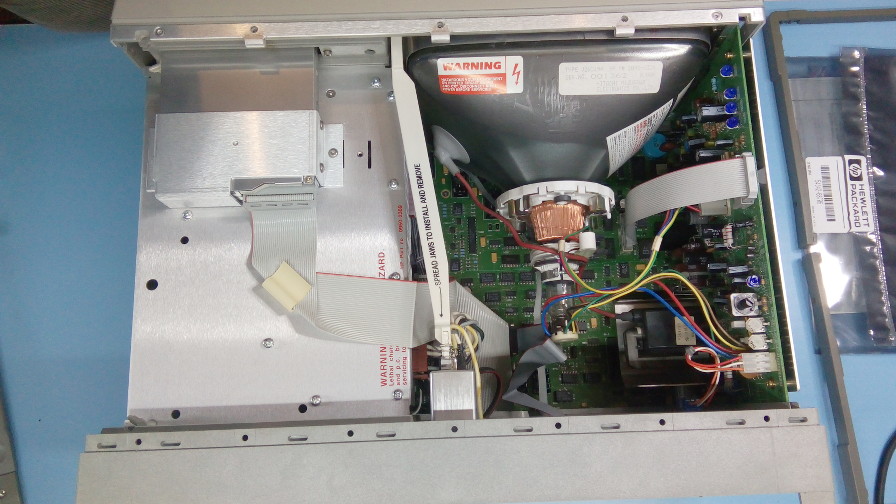
To probe further we have to remove the power supply, which is done by removing the floppy (2 screws) and pulling the two long plastic lock pins up. The PSU itself looks identical to the one in the 53310A. 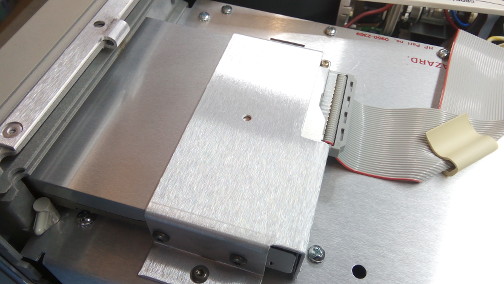
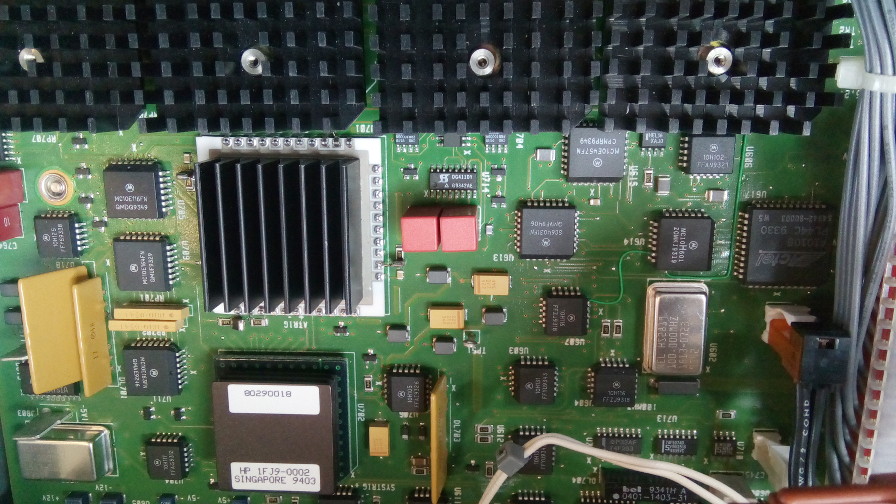
The 3 connectors of the PSU can then be detached and the PSU pulled away. Why pull the PSU you ask? Engineer porn: it's below the PSU that the front ends and acquisition hybrids are waiting for us, in all their glory. Looking at the entire PCB the most recent date code is 9413. Here too, everything is very clean: 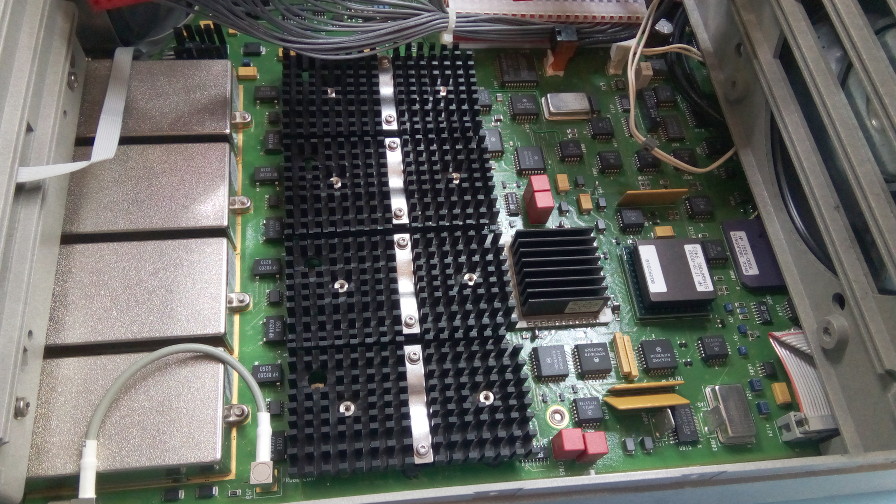
Before putting everything back together let's look at the fan. It's massive and blows inwards, apparently a necessity to cool the hybrids. Why did HP not add little fans over the hybrids themselves? Strange. Because the fan is far from the hybrids and there's the PSU and other plastics in the way, which means the fan must blow hard. And that means a very noisy fan! I'd like to find a replacement, and to do that I need to access the part number (conveniently missing from the service manual). This requires removing the back panel, which is a bit more involved. It also requires disconnecting the front power button rod, which is nicely labeled 'SPREAD JAWS TO INSTALL AND REMOVE'. You do want to follow that instruction, but the jaws themselves look ready to break! What do? I tried to not disconnect the rod: after all I won't be completely removing the panel. I just need a peek at the fan. Well, it turns out you really should disconnect that rod: the switch plastic is very weak and the weight of the dangling rod is enough to break it. Luckily the switch only works in positive (push) pressure mode, hence a little glues solves the issue. Pride not intact though :/ Still I was able to gather the fan model number: 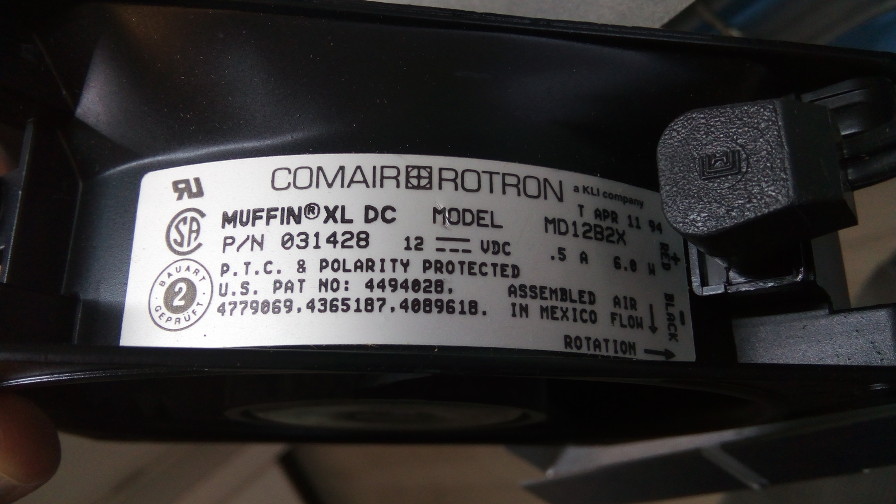 The rear fan sticker: Comair-Rotron Muffin XL DC model MD12B2X. 12VDC, 0.5A, 6W. According to the manufacturer specs (if you can find them), the fan is a 3100rpm, 110cfm, 0.278inH20 (69.2kPa) jobbie. THe bad part is the noise level: 51dBa! There's a few replacement candidates but I haven't decided/bought/installed yet. I'm thinking about reducing the fan specs and adding dedicated fans over the hybrids. Something for the future. Here's a rough equivalence table in the meantime:
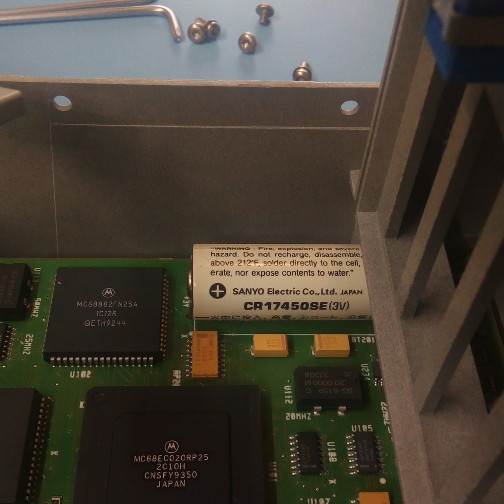
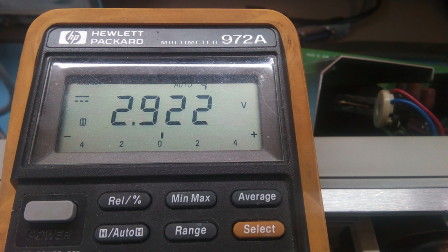
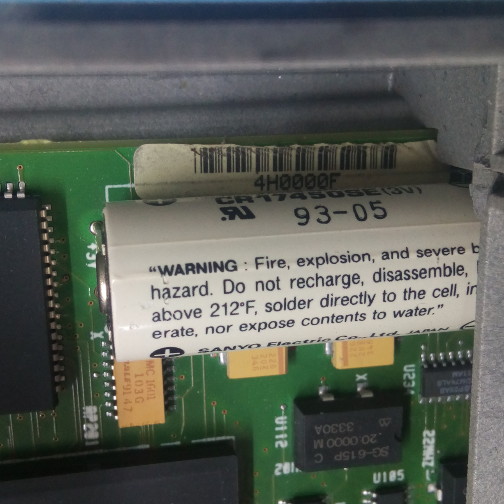
One last check was of course the battery. Ah, the old times before flash... Although it is visible its date code is not, so I removed the display board to reveal it. This one is a Sanyo CR17450SE-FT1, the original one dating back from May 1993! It still has 2.922V in it, but I will replace it soon just for safety: 2.922 is very close to 3V, but looking at the curves in the Sanyo specs it could still be months from dying. ' 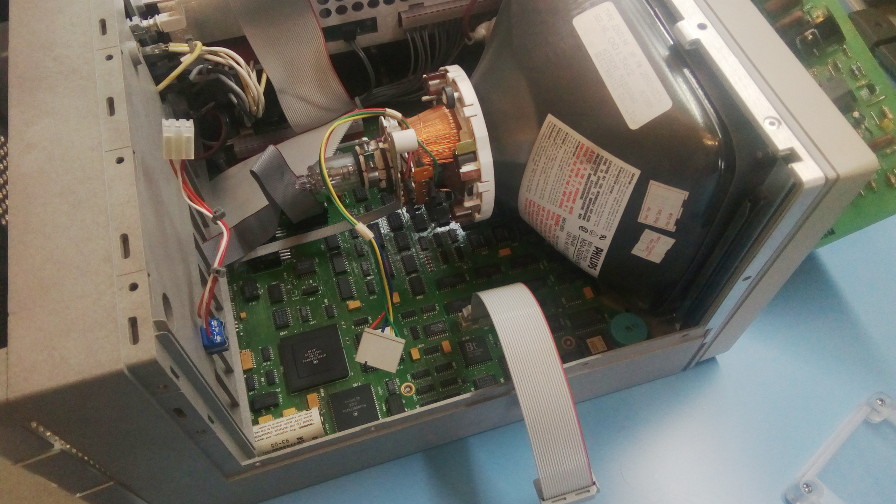
That's it for this onboarding session. Altogether a nice find! | |||||||||||||||||||||||||||||||||
| © 2024 Damien Douxchamps. All rights reserved. | |||||||||||||||||||||||||||||||||