Switches maintenance for the HP-8112A | |||||
|
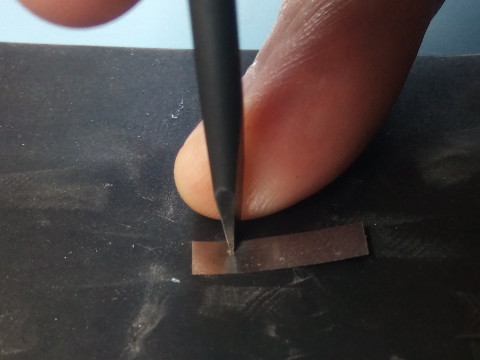
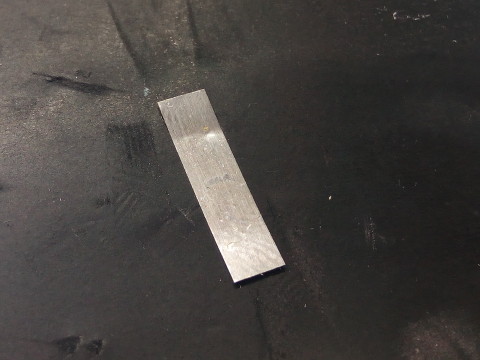
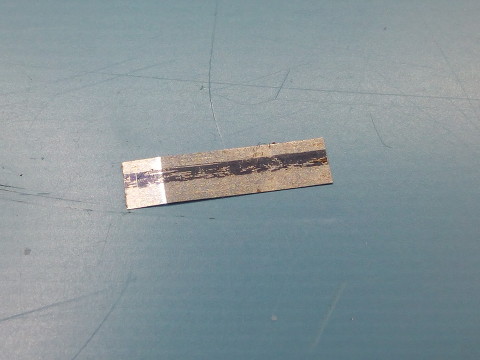
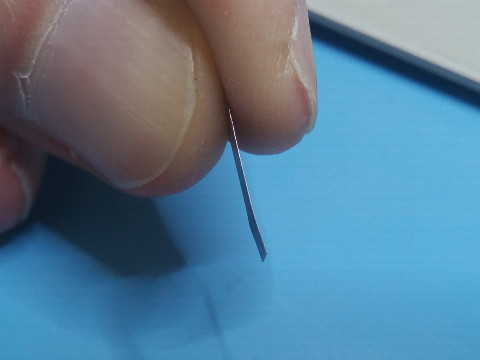
The HP8112A pulse generator is a nice and cheap piece of equipment these days, but it does show its age particularly in its period-correct HP switches that can become a little sticky. These switches are found in numerous HP gear of the era, for example the frequency counter 5334A/B, the 8116A signal generator etc etc... Given how prominent they are for the cash-strapped hobbyist it would be a shame not to find a way to maintain them and give them the nice tactile feel they had in their younger days. For the HP8112A, everything starts by removing screws located on the top and bottom of the front bezel. Pushing the front panel gently from the inside then liberates it. All the front panel BNCs are connected with soldered cables, so be careful during that step: you don't want to mess the connections up. 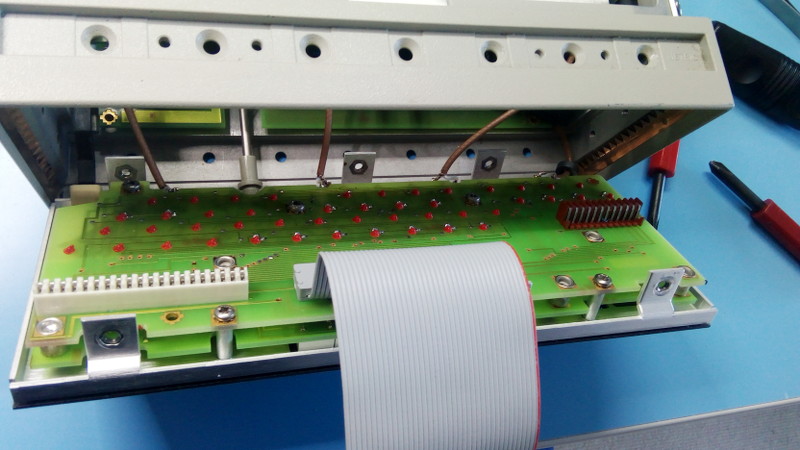 The HP-8112A front panel liberated. The 7 or 8 screws' brackets are easily spotted in this picture. 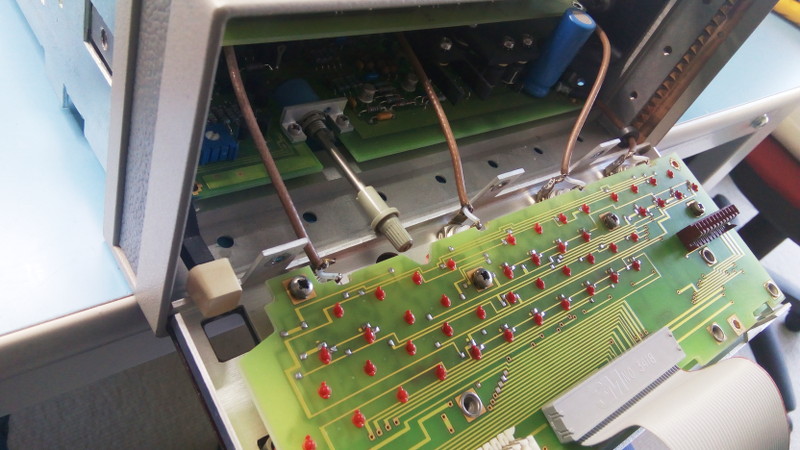 The HP-8112A front panel wide open. Not the red dots: those are the plastic bases for the switches that are melted down on this side of the board. The front panel's electronics are attached with 7-8 more screws. Removing them liberates the PCB which we can now work on separately. The remaining aluminium panel with its square cut-outs in a thing of beauty and a joy forever. 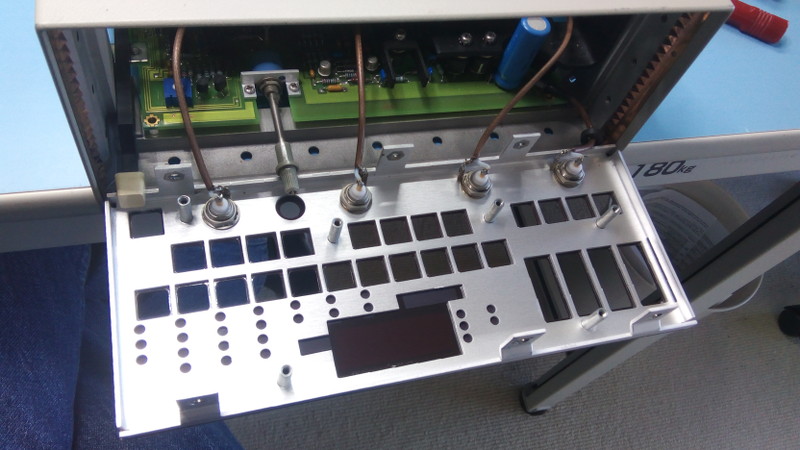 The HP-8112A front panel structure without the PCB. Beauty. Now we can concentrate on the PCB and its switches. This particular instrument has 23 of 6 types: clear with and without LED, dark with and without LED, LCL and green with LED. Why green? I don't know, but I've notices that many HP instruments have one or two colored switches and this design trend lasted a long time. For example signal analyzers like the 4295A, 4296B or 89441A also have a few colorful buttons. It's looks really pro, so I think HP did something right there. If you're responsible for this design feature, kudos to you sir! 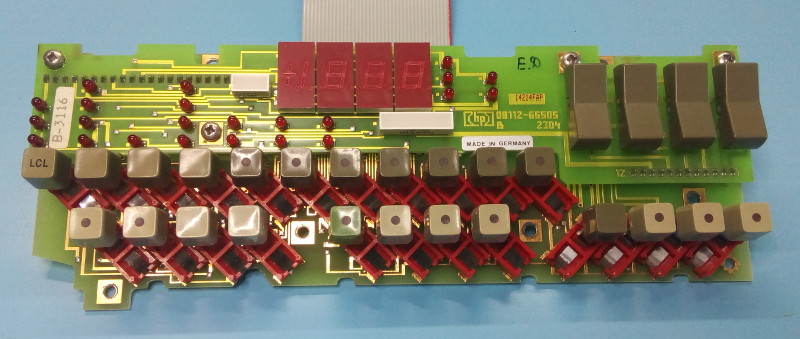 The HP8112A front panel PCB. One design element that strikes us now is the 45 degrees orientation of all switches footprints. This allows the maximum density of switches, and when you look at the PCB you realize that maybe HP really filled the front panel to the max. In order to continue the maintenance we need to remove all the key caps, and this is easier said than done: the caps are very firmly attached to the stems and the last thing we want is to break them. I used pliers with a thin rubber sheet and pulled firmly straight along the key axis: 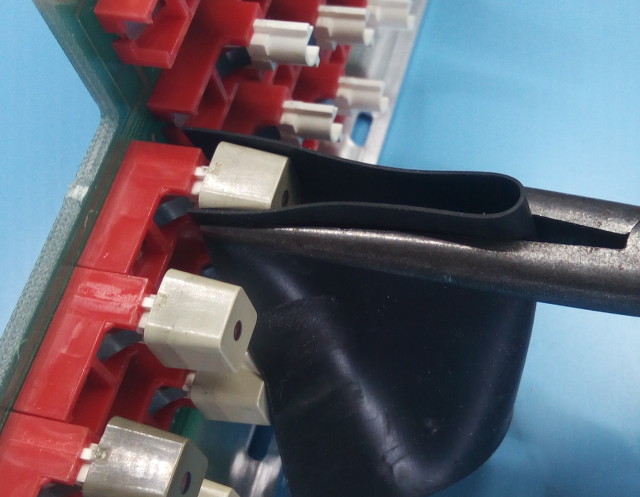 Not the 8112A but similar: pulling the keys from the HP-5334A front panel PCB. Once the keys are removed we can start removing the metallic springs of each key. Removing them and putting them back afterwards is the most annoying part. You'll need to get the hang of it! Personally I used a small screwdriver to flick them out of the red frames, then pull them with pliers. This is only possible for the ones that are easily accessible along the edges, for the others you'll need to put your tongue at the right angle for sure... 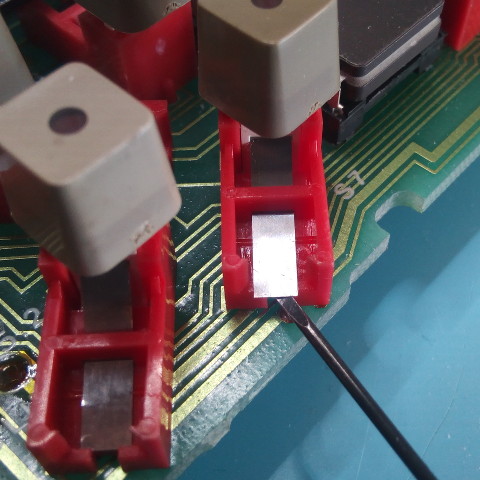 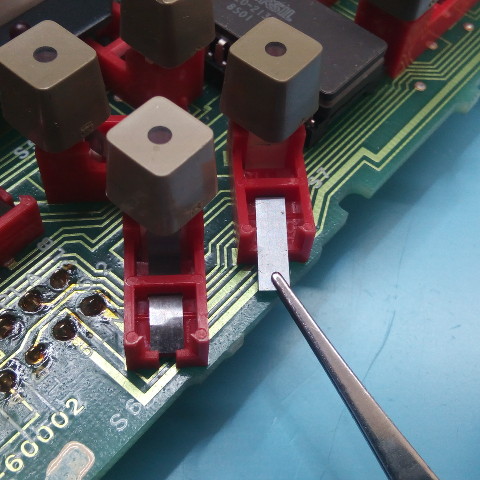 Lifting and pulling the springs (also on the HP5334A counter) To prevent the springs from getting stuck I made a small indentation in them. Afterwards they are inserted back in the red frames, the little bent located far away from the plunger and bulging upwards. That way when the switch is pressed the spring naturally wants to bend upwards, removing much 'crooked action'. To make the bend I use a flat screwdriver and press on the spring over a thin rubber sheet:
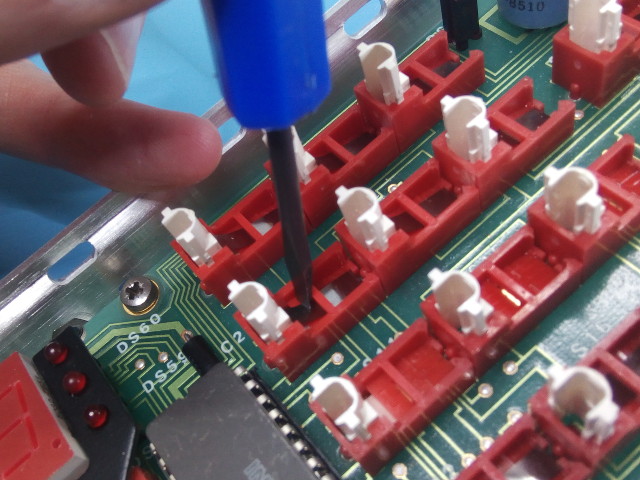 Spring insertion. We can now put the spring back in its red holder. I choose to insert it from the top, then use a flat screwdriver to push it a little more so it engages with the white stem. Holding the white stem up during this operation makes things easier. And that's it! Of course we still need to put all the keys back in place after that. And of course you have a picture of the instrument before starting the repair, so you know which key goes where, right? ;-) There's a few other post on the interwebs about this issue, including a couple of youtube videos (at least one of which from Curious Marc). What they recommend is to use Deoxit Gold as this contact cleaner is also a lubricant. I may give this a try next time I open my instrument for its annual health check. This is important for the 8112A by the way, as like many instruments of the era it has a lithium battery for backing up settings its GPIB address. Happy tear-downs! | |||||
| © 2024 Damien Douxchamps. All rights reserved. | |||||