Retrobrighting the HP-4396B front panel | |
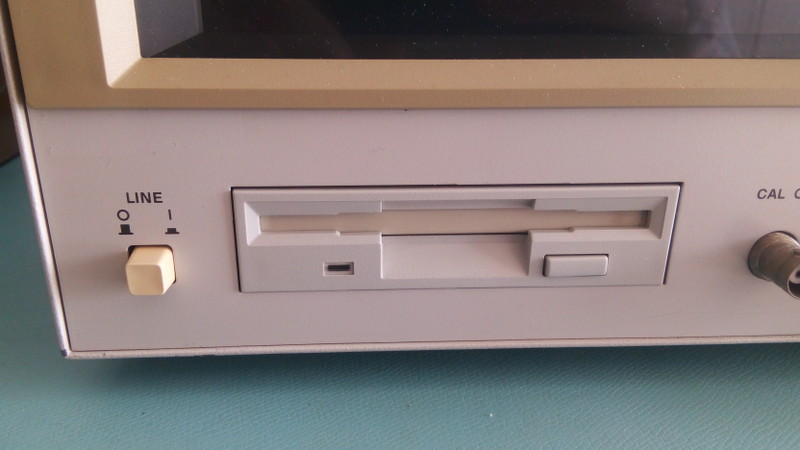 Yellow plastics on the front panel of the HP-4396B Yellowing plastics is a bane of old gear repair/rejuvenation: what's the point of spending all that time if the instrument looks like crap at the end? Luckily there is a solution: the 'retrobright' rejuvenation method. Or should I say methods, because there are quite a few. This instrument is the first one I bought where the problem is bad enough that I want to fix it. Four plastic pieces have not aged well: the power button, the LCD bezel, the thin plastic boarder surrounding each key and the FDD door. Not the FDD front panel itself, just the door. Go figure. Parts can react differently to strong sunlight exposure; for example paint is typically immune to the problem (it's not plastic) which explains why the instrument's panel is fine almost everywhere except for some specific plastic bits. Speaking of bits, this 8-bit Guy video (among others) was very good and gave me enough confidence to give it a try (some of this confidence was misplaced, as we will see...) First of one needs to find a hair product called "developer", and the strongest possible. The strength is expressed with a number like "20", "30" or "40", and to find the concentration in hydrogen peroxide you just divide by 10 and multiply by 3%. Thus "30" means "9%". Here in Japan I could not find the usual 'Salon Creme' brand that are used on the web for this purpose, but I did find an Amazon listing for an even stronger version with 15% concentration ("50"). Free shipping to Japan and it actually came all the way from the US! Since this is my first test I started by treating a random piece of yellow plastic I found around my place: the battery cover of a remote control. It came out OK but the sunlight that day was not great so I left it in the bag overnight. The next day the sun was out and it was time to add the HP parts! For this batch I was only targeting small pieces: the power button (plus another identical power button from another instrument) and the FDD door. Removing the power button is easy: just gently (but firmly) pull it out. Removing the FDD is a more involved affair. First the back cover must be removed, then the FDD assembly can be extracted by removing its 4 mounting nuts (not screws). Don't worry: the screws won't fall off, those are inserts in the metal sheet. But there's a problem: one nut is partially blocked by the power switch body and cables and is very hard to get to. I ended up removing the front panel to try to access it but it was not necessary as nothing was to be gained there: the switch assembly can only be removed by disassembling the front bezel, which is a pain. Just leave the front panel and bezel as is and use a thin enough hex tube to extract it. Good luck. When removing the FDD assembly pay attention to the FDD data cable, its hidden power cable as well as the front panel keyboard cable that is clipped to the assembly. The after removing 4 screws we can extract the FDD from its assembly. It's a standard Misumi 3.5" unit and can easily be replaced, something that can't be said about my HP-54542A's FDD which more of a custom jobbie. The thin FDD cover is easily detached as it is only clipped in place, and the front panel can be unclipped just as easily. The last hurdle is to remove the door from the FDD front panel. For this you have to gently bend it so that the little prong at one end gets out of its hole. Gently is the key here. Remember how the little spring is set up, see pic below. 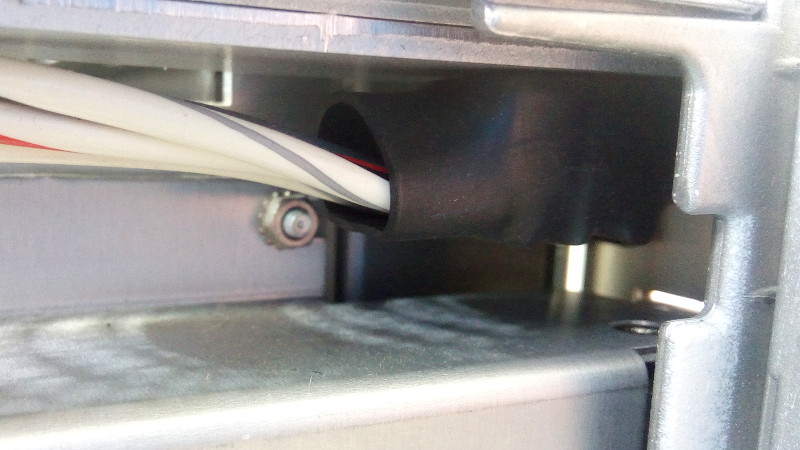 A hard to reach nut near the mains power switch 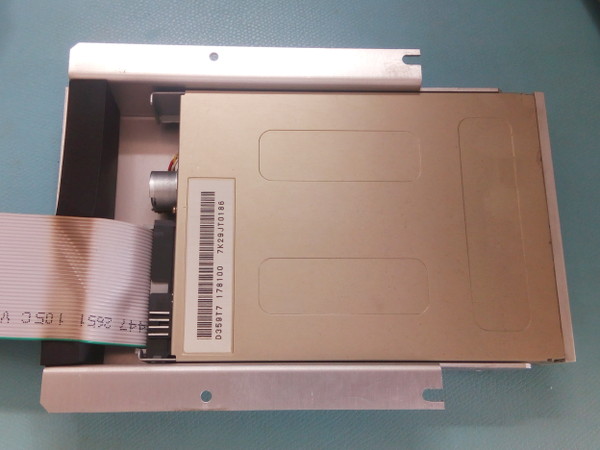 The extracted FDD assembly 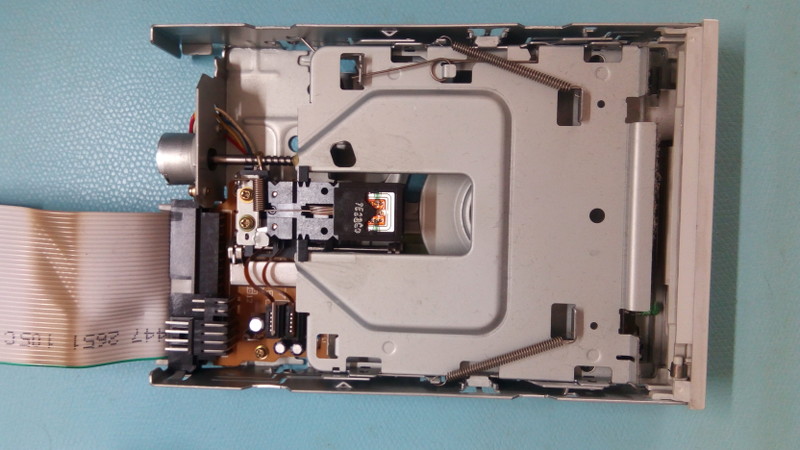 The FDD after removal of its thin metallic shield/cover. 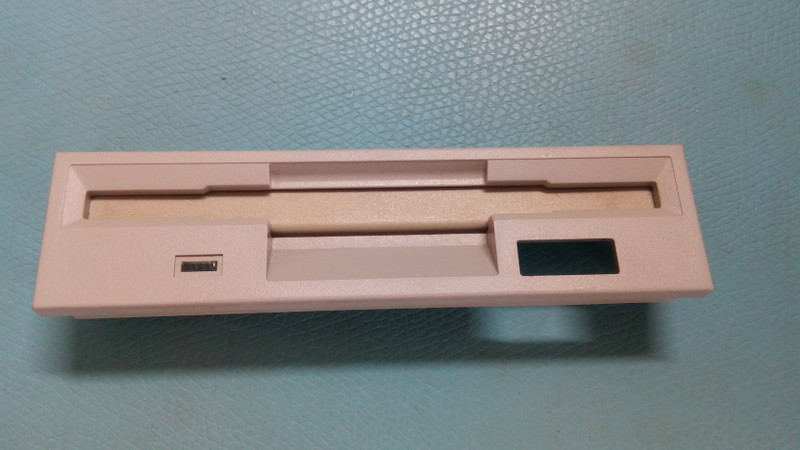 The extracted front panel of the FDD; note the yellow tint on the door. 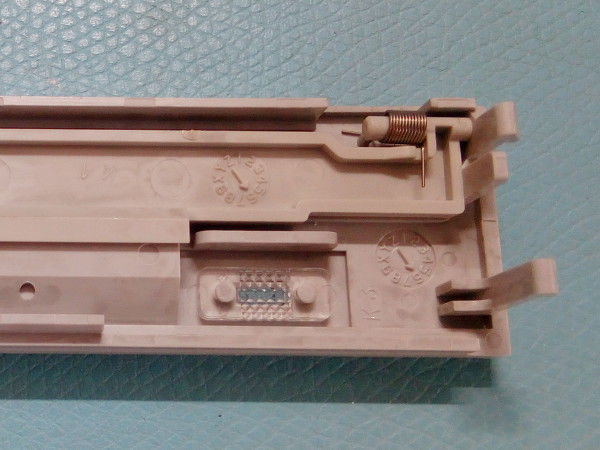 Note to future self: this is how the spring is supposed to be used. 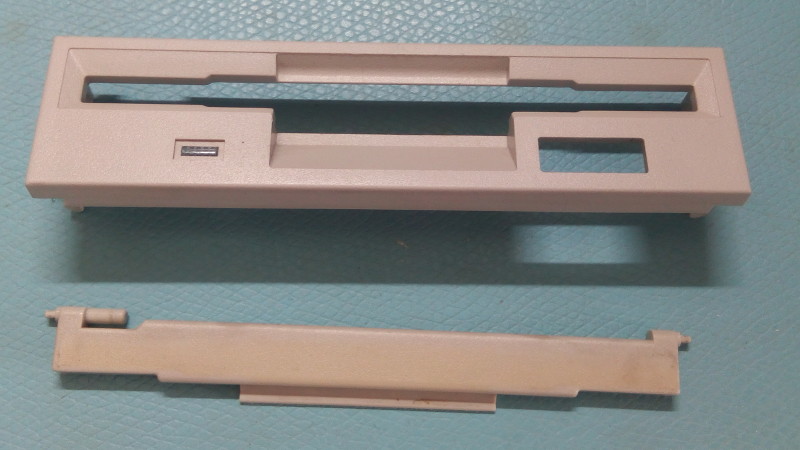 The FDD door separated from the front panel. Yellowing is clearly visible. Now we put everything in a ziplock bag, add the "hair developer" (aka peroxide), massage things a bit so every face is well covered and we can leave that in the run for "a while" (typically a whole day). Avoid the ziplock logo covering your parts. To avoid uneven processing I placed the bag on a small turn table I sometimes use to test video processing with gstreamer: you need something moving for those tests! Here's it avoids constant shadows and lets each face be nicely illuminated by the sun's UV. 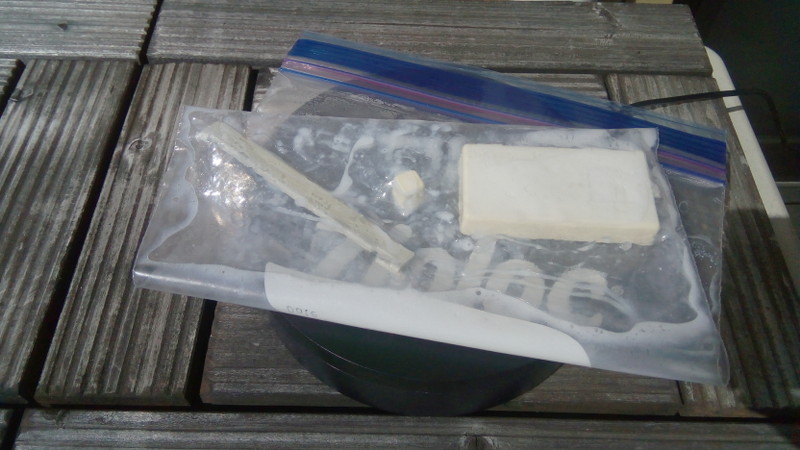 The parts in their ziplock bag are placed on a turn table. A little note: the ziplock bag is important to avoid evaporation. It's also good to keep all the oxygen generated by the UV+peroxide reaction in the bag for maximum efficiency. Check that your bag is sealing properly and is airtight! Now that the curing is ongoing we go back to our bench and realize what a mess it is: it's impressive what is needed just to extract those little parts! (granted the front panel disassembly was not required, but still...) I recommend you put all those screws and little bits (like that FDD cover spring) in a nice organizer box during your tear downs. Ask me how I know. 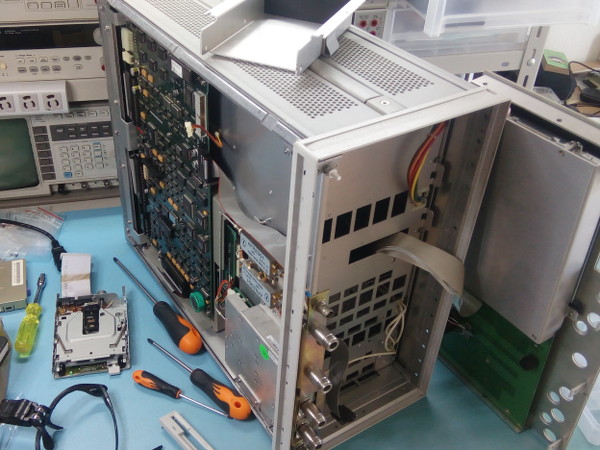 A very messy bench 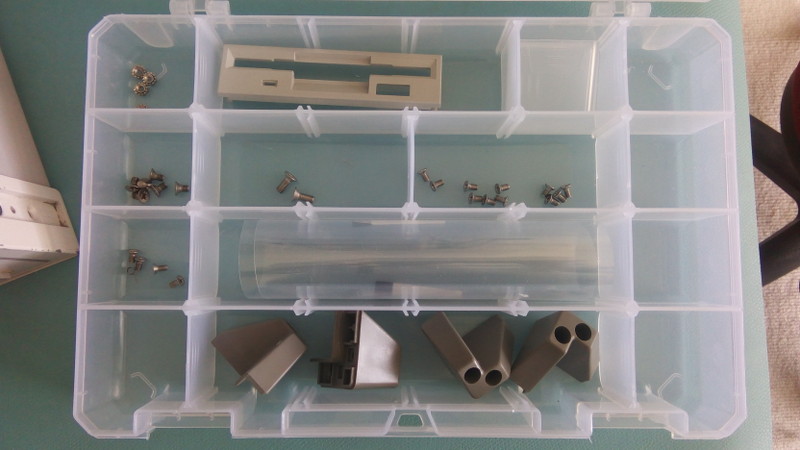 Organize! Here's where things get "interesting". The 8-bit Guy video mentions that heating the parts in peroxide is faster way to get good results. As the sun was not hitting my balcony any more I gave that a try. But I lack temperature control so I was just winging it. Big mistake. See the remote control battery cover is made of a much weaker/softer plastic and part of it melted! Not a huge lot, but it did shrink 2mm, making it a little hard to put my remote control back together. Very very luckily the other parts are just fine. I suppose the cover was made of some styro-something, but whew that was a close shave. So I do not recommend trying the heating method unless you know exactly what plastics you're working with and you have temperature control. You've been warned :-) Here are the reassembled front panel with its shiny power button and its nice white FDD door. The door is actually even whiter than the FDD front panel itself, but I'm not going to rectify that ;-) Or maybe I will?? ( ^-^)v 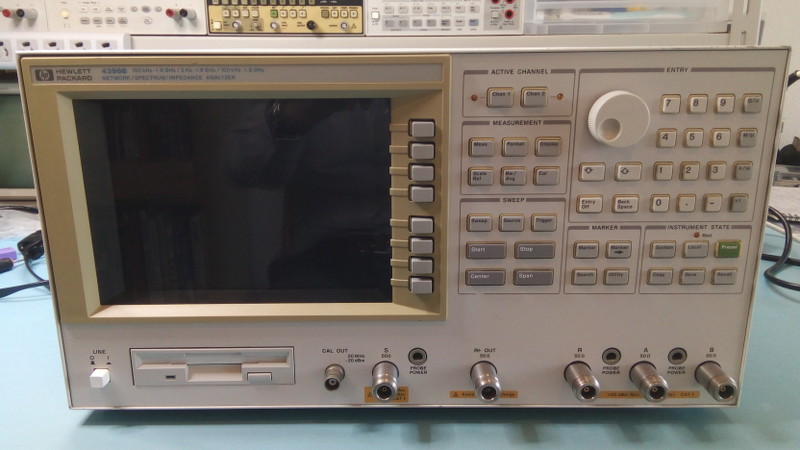 After the retrobright process, part 1 Now that I got some success with small parts the next step is to process the two larger pieces: the LCD front bezel and the soft keys' frame. Since these are my first baby steps into retrobrighting I will try another technique: for these two larger parts let's use the ozone+UV setup. The ozone will come from the decomposition of the peroxide. With this setup the parts don't need to be dipped in the peroxide 'goo' and it will be a more gentle and gradual process. Plus we will have more uniform results. The two parts we have to treat are here: 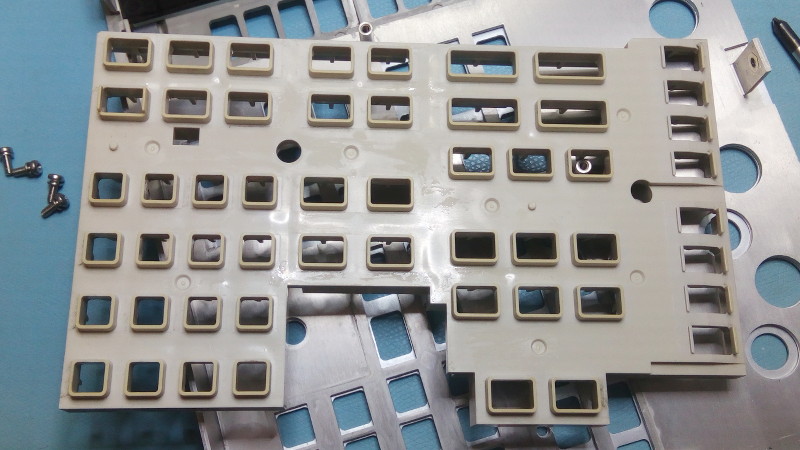 The keyboard frame. Note that only the top and sides of each key protrusion is yellowed: the bottom part is under the key and was protected from direct sunlight. 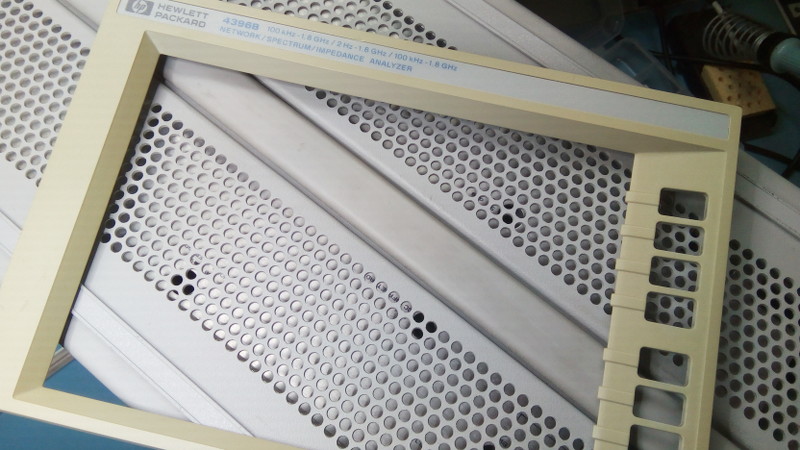 The display front bezel in its original yellowed condition And looking at the back of the display bezel we can see its original gray color: 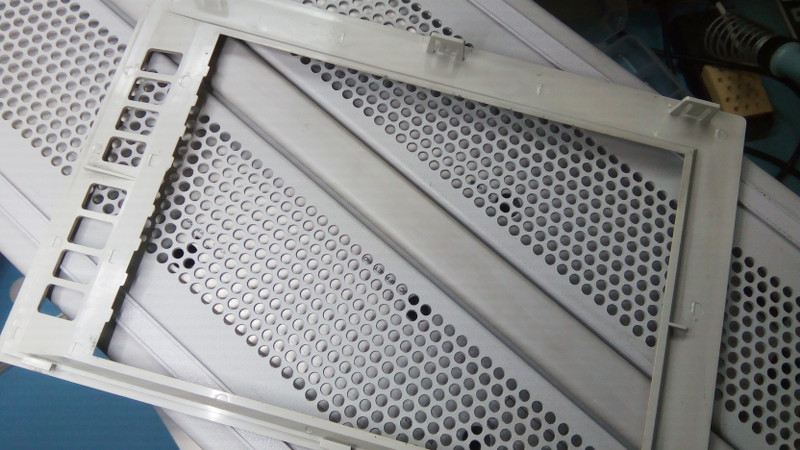 The original color of the display bezel The setup I came up with is the following: get an air/watertight box, put a recipient containing the peroxide creme inside, and place the part on top of the recipient, the face to be treated on top so it gets a good dose of UV. As before the box is placed on a small USB-powered turn table, with its lid closed of course. Here is what it looks like (and yes the recipient for the peroxide is a DVD spindle case!) 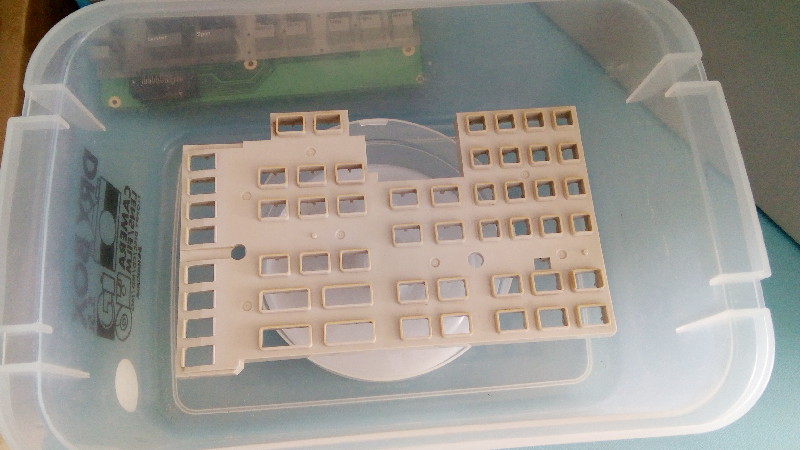 Since it's only early spring at the moment the sunlight and UVs are limited and it took a good two weeks to get both parts treated. Typically 3 days are required per part, with about 5 hours of sunlight per day. I replaced the peroxide creme at the beginning of each day, although that may not be 100% necessary. There was a clear out-gassing activity in the cream when enough UVs are present as its surface was full of bubbles. I also tried to add water to the creme but this did not have any advantage. One last note: evaporation will cause water droplets on the lid and those may fall on your part. This can cause uneven coloring, in my case those regions were treated a very tiny bit faster. But given the slow process it's easy to rectify. To conclude here are the obligatory before and after shots: 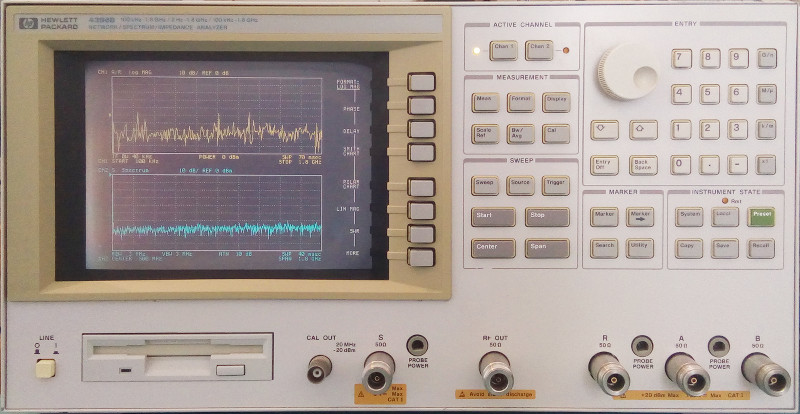 HP4396B before 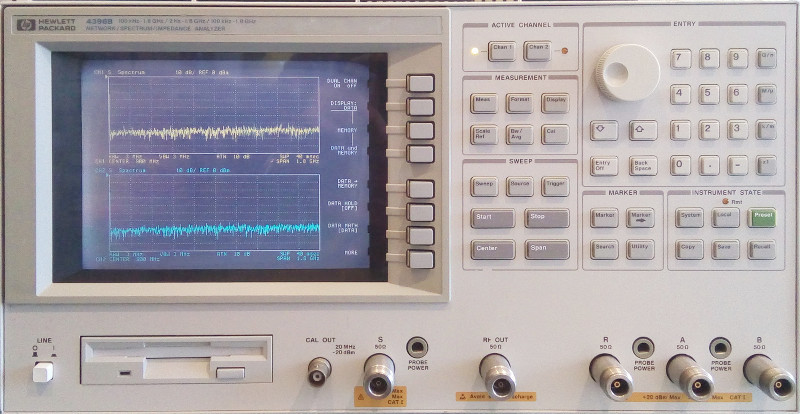 HP4396B after 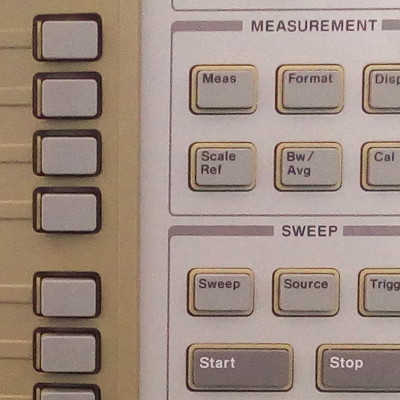 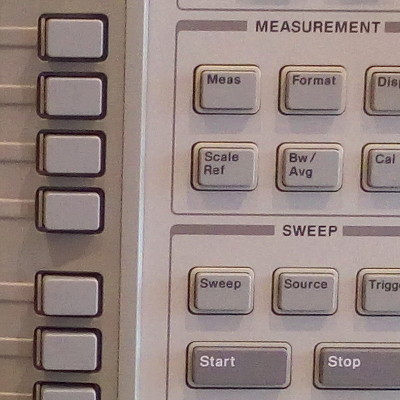 HP4396B front panel detail before and after retrobrighting That's all folks! Now on to applying this to other old instruments in dire need of a 'cure de jouvence'... | |
| © 2024 Damien Douxchamps. All rights reserved. | |

