HP-4396B LCD replacement | |||||||||||||||||||||||||||||||||||||||||||||||||||||||||||||||||||||||||||||||||||||||||||||||||||||||||||||||||||||||||||||||||||||||||||||||||||||||||||||||||||||||||||||||||||||||||||||||||||||||||||||||||||||||||||||||||||||||||||||||||||||||||||||||||||
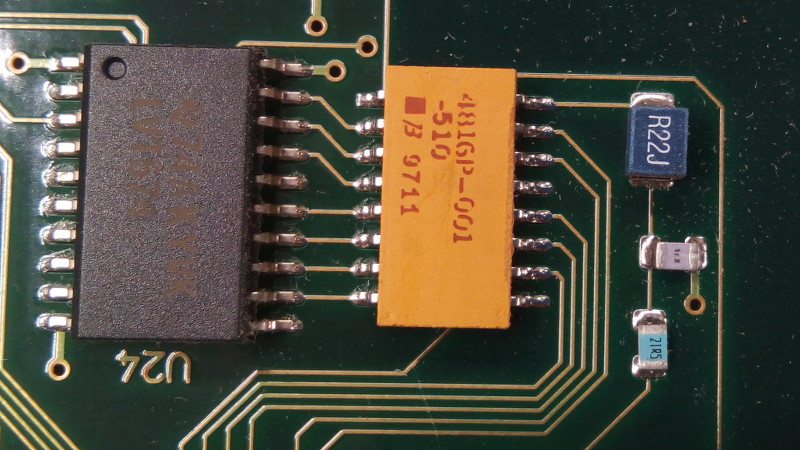
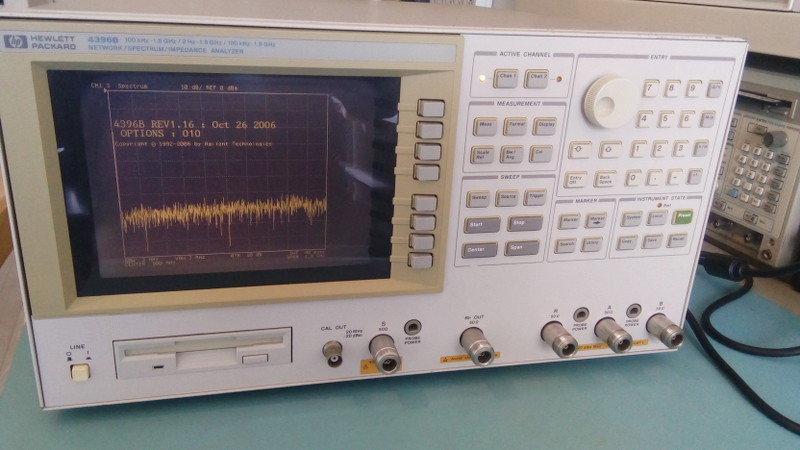 An HP4396B with a less than stellar display: low contrast, low luminance, low saturation, darkened corners,... Buying something on FleaBay(tm) for a 'great price' means that, 99.9999% of the time, you'll have to fix something. And therefor learn something. It's a win-win! I would not call my Hewlett-Packard 4396b purchase price 'great' but it certainly was way below normal because of a display issue: the display was flipped upside down! That was 'promptly' fixed during my first tear-down of this boat anchor but this fix is not really satisfactory. Indeed, the LCD display quality is way below par with issues like dark corners, poor contrast, abysmal luminance and terrible viewing angles. So what can we do about it? Obviously the LCD is far past the repairable state and must be replaced. But it's also 30 years old. Who you gonna call? So let's start a little investigation (full disclosure: altogether this took me a good day to figure out...) First is the display model number: Sharp LQ9D340. Many impedance-related products were designed in Japan by the Yokogawa-HP (YHP) joint venture, and this spectrum/network/impedance analyzer is no exception. So finding a good-ol Japanese part is kind of expected. But LCDs in the late ) 90s were not exactly great, in fact they sucked really bad. At the time CRTs offered much better contract/luminance/color etc... So why use an LCD in a $30000+ piece of equipment? Simpler, cheaper, lighter. And while many CRTS will happily live past their 30 years old mark, LCDs can age a lot faster than you may think. A first clue about the LCD issues should have been in the device front panel. Some plastics have aged and turned yellow, a sure sign of the instrument being exposed in the sun, probably on a storage shelf somewhere. What does that have to do with the LCD? Well LCDs consist of a number of sandwiched layers: polarizers, filters, glass, etc... Some of them are glued (polarizer on glass for example). And glue+heat cycles is not a great recipe for longevity. Plus different materials like glass and plastic can have very different thermal expansion coefficients, leading to delamination. Ask me how I know. So let's get to that LCD panel and see how it looks like... The front panel is easy to remove... once you know what you're doing :) No need to remove any screws except the ones on the top and bottom edge of the front assembly (remove the trim on the top part if needed). But watch out! For the bottom screws don't remove the screws that I marked with a cross in the picture below: those are 1) not retaining the front panel but the front connectors and 2) they are actually different from the other screws (metric vs imperial) which can lead to confusion and damage when putting things back together. You've been warned: those buggers really look similar! 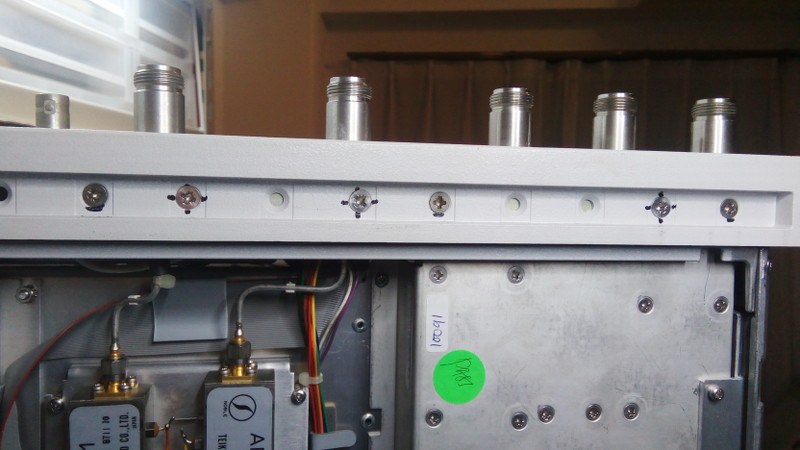 Don't remove the screws marked with a cross: they are actually different and lead to confusion and damage during reassembly. Once pulled out the front panel's inner side is very clean: just the keyboard PCB and a metal cover for the LCD. Oh and an over-engineered rotary encoder, complete with HP branding! Note that removal of the front panel requires removing the top covers of the analyzer in order to disconnect the LCD panel's FPC and backlight cables. 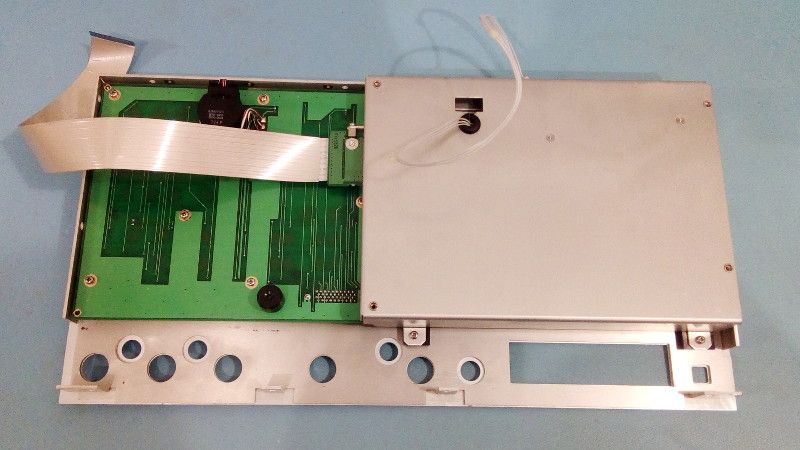 The back side of the front panel 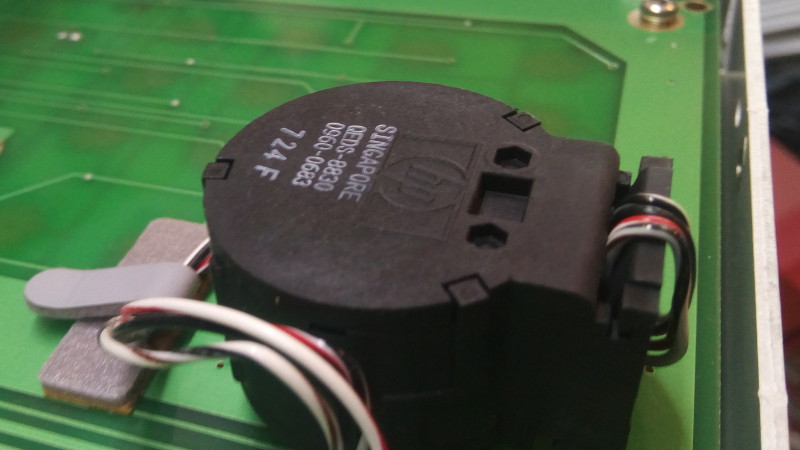 An over-engineered rotary encoder? The LCD assembly can then be detached by removing two screws only. At this point we can see the LCD panel for the first time, and it's not pretty! I was surprised to see ripples on the LCD surface itself. Yes, the polarizer layer had warped to the point of making ripples. Ugly, and almost completely invisible behind the front panel's protective plastic layer. Clearly the repeated heat cycles due to sun exposure have had their toll on this puppy. Now it's clear the display is foobar'ed and must be replaced: 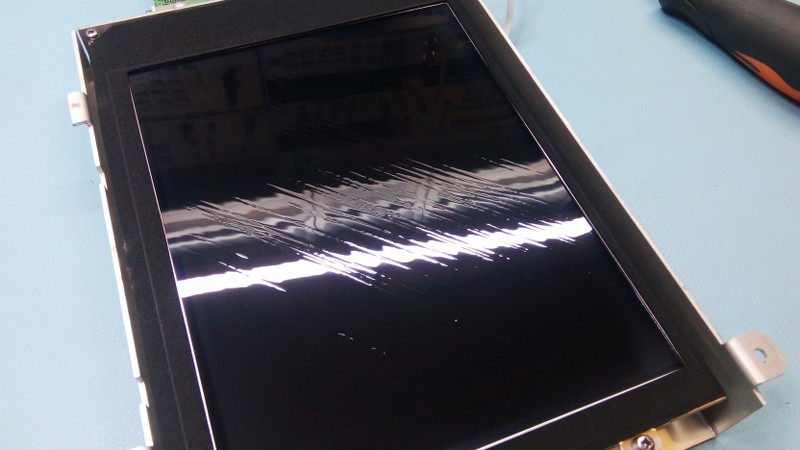 The LCD panel in its assembly: ripples galore! The LCD module is 4 screws away of being finally isolated. Once detached we can see the high-voltage inverted for the backlight CCFL. Don't forget to unscrew the fifth screw that locks the small FPC cable adapter board to the assembly's aluminium shell (yes, 5 screws instead of 4, sorry) You can then disconnect the backlight cable and be also very careful when you pull the FPS cable through the rectangular hole in the shell: the edges are sharp and can damage the cable. 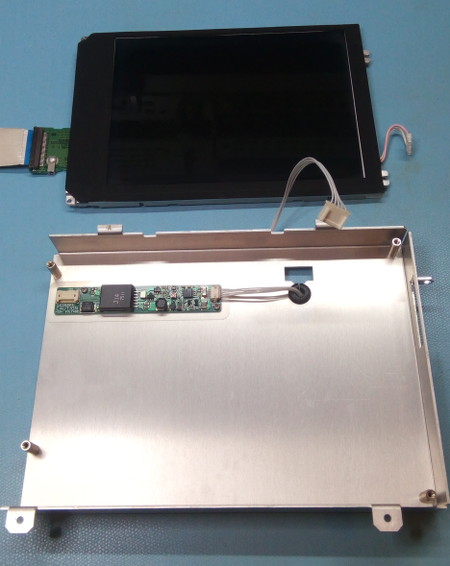 The LCD module separated from its assembly. Note how the ripples disappeared when the LCD is viewed from the right angle, partially explaining why the ripples were almost invisible when the LCD was mounted in the instrument. Now we can do the final disassembly step: disconnecting the FPC cable adapter board from the LCD module: 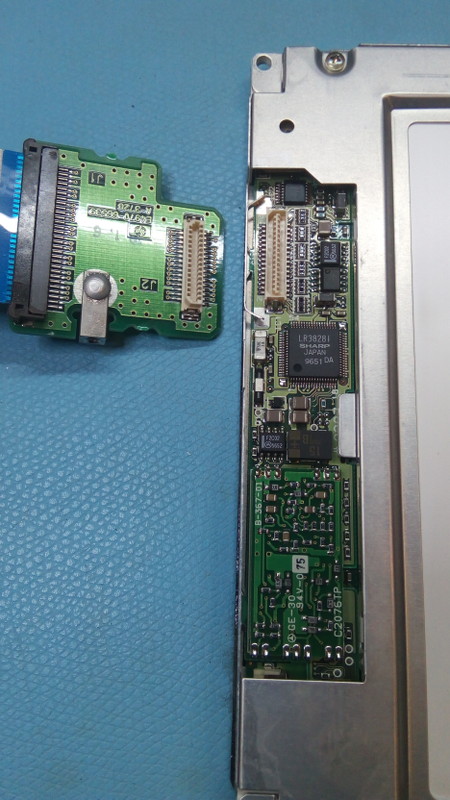 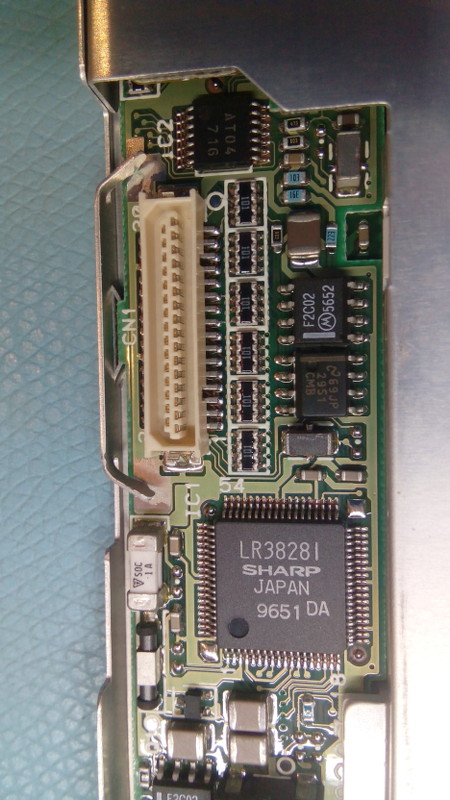 The little interface board between the FPC and the standard 31-pin LCD module connector and a zoom on the LCD module's exposed PCB area 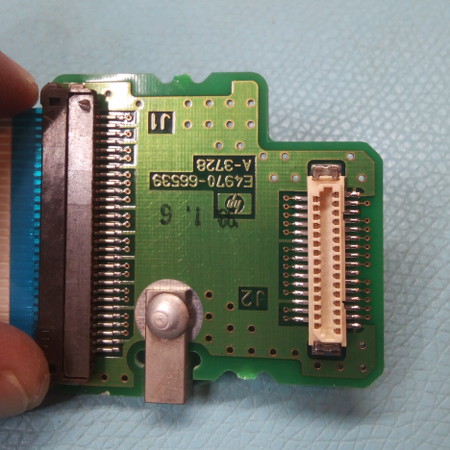 The little board that helps connecting the FPC to the LCD module. At this point we can easily manipulate the LCD module and finally find its reference number printed on its back side: Sharp LQ9D340. Where are we going to find a replacement for it?? 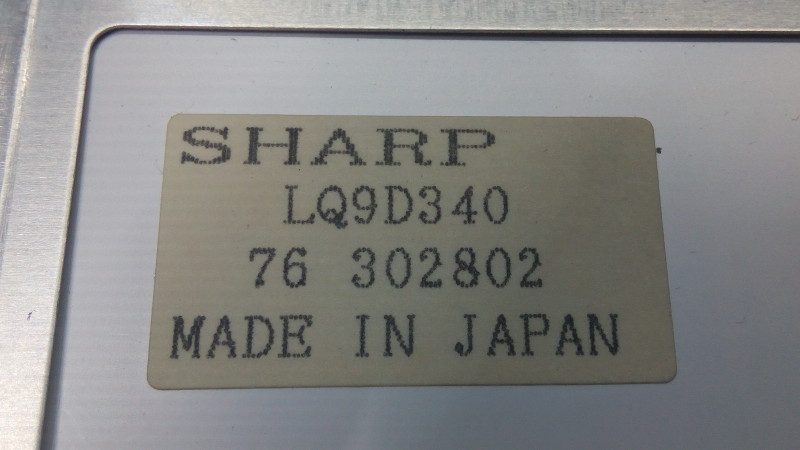 The HP4396B's LCD module reference number. After hours of searching the interwebs for datasheets, mechanical drawings, reports and pin-out diagrams I can to the conclusion that yes, there are more modern replacement part numbers out there but no, it's almost impossible to buy new parts. Almost all parts have been discontinued 5-10 years ago. But let's first have a look at the requirements:
Luckily the electrical issue is resolved relatively fast: many models use the Sharp 31-pin connector and are compatible. But the 31-pin connector is linked to the instrument via an adaptor board and a 29-pin flat-flex cable. So let's have a look at that first, shall we? Here's the translation table:
From this table we can see that while the display has a 6-bit per pixel control (2^18=262144 colors), HP only uses 4-bits per pixel by tying up bit 0 and 1 (LSB) to bit 5 (MSB). An interesting way of doing things, no problem there. We can also see that the pin-out corresponds to the one seen in the LQ9D340 datasheet (which took me a long time to find on the interwebs, you're welcome!). Armed with this knowledge it's time to find a few compatible LCDs. Here's what I came up with:
Unsurprisingly most of the compatible models are from Sharp (LQ model numbers) but there's a couple of other brands as well. But those are not as easily sourced so staying with Sharp is the best bet. The overall best candidates are all from the LQ084V1DG series. Compared to the LQ9D340 the datasheet differences are:
I tried both the '21' and '42' LCDs and both failed: only a white screen was shown on boot. This tells us that the backlight control is OK, which is a start. So what's going on?? Well now things get really deep and complicated and TBH I was really stuck for a while until I stumbled upon this service note from Hewlett-Packard. A-ha! Apparently there were two revisions of the GPU board, and older board cannot drive a newer version of the LCD. So HP did some LCD/GPU-board mismatches during assembly and this is the only reason why we can tell that newer displays won't work with older GPU boards. WTF? The Sharp interface is standard so this should not happen unless HP has been doing some funny business, like having poor clock signals :/ The service note was also updated the same month of 1998 with a new version that expands the serial number range that can have this mismatch issue. I spotted a newer GSP board on ebay and it still has the 3 passives on the clock line so that may not be the issue. Plus the service note says that some text should appear on the screen after about 20 seconds, which means the issue may not be hardware but rather software, which is even weirder. Anyway, my unit is using the older GPU board unfortunately, so any new display won't work. Looking back at that EEVBlog article, the device in question was using the LQ9D340H, not the LQ9D340 that I have in my unit. Thus this newer "H" version and the much newer board from the different device in the article match and work, and can be upgraded. But am I stuck? Digging deeper and deeper... The 4396B manual mentions part number 2090-0534 for the LCD. The newer part mentioned in the service note is 2090-0574. Can we attach Sharp model numbers those numbers? The Keysight website gives us one data point: the 2090-0574 is a Sharp LQ9D340H: 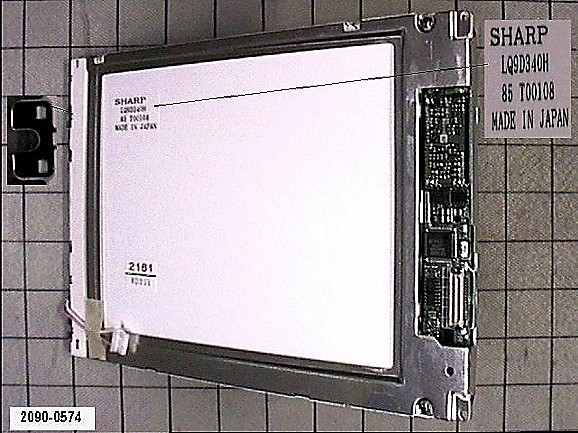 The 2090-0574 reference is the Sharp LQ9D340H. Then service manual for the HP-4395A, which is very similar and uses the same display parts, is in that regard quite interesting. Contrary to the 4396B, the 4395A service manual mentions the several display upgrades starting from page A-3 (pdf page 293). Two other LCDs are mentioned there: 2090-0361 and 2090-0534. Since my serial number is within the service note range I expect my unit to be just one revision behind the one refered to by the service note, and hence I would say that the 2090-0534 is the Sharp LQ9D340. Keysight website only mentions that the 2090-0534 is 7.3mm thick, which matches the LQ9D340, but who knows what the 2090-0361 actually is at this point. In any case the H version corresponds to the GPU board upgrade mentioned in the service note. My unit has an older GPU board and LCD, and is thus harder to upgrade :( :( Side note: the LCD backlight inverter board also changes: the unit paired with the 2090-0361 LCD is referenced 0950-3749 and is 0950-2924 for the 2090-534/2090-574 LCDs. Here's a pic of the board on my unit: 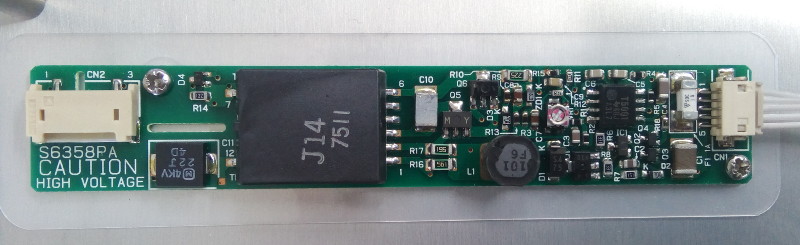 Backlight driver 2090-2924 (S6358PA) A Chinese website mentions the following: "The LCD (P/N 2090-0574) used for the 4294A was obsolete and replaced with a new LCD which employs a long-life backlight lamp. It is assumed that lifetime of old LCD's backlight will end in 2004 and after. So, when the backlight lamp of the old LCD is faulty (burned-out), replace only the lamp (P/N 5188-1364) with a new one, not whole LCD unit. This is because the old LCD (2090-0574) unit was no longer supplied and we cannot have enough number of it to replace all defective LCD units. When the LCD itself is faulty, replace the faulty LCD with the old type LCD (use P/N 5185-3731 in place of the obsolete P/N 2090-0574) or new LCD (P/N 2090-0361) depending on the instrument serial number. (The LCD contains the backlight lamp, but the backlight lamp in the new LCD can not be replaced independently) The new LCD has different assembly size from old one and new replacement parts for the new LCD have been set up." We now have two more numbers to play with: the backlight lamp 5188-1364 and the 5185-3731 LCD. The backlight lamp has another number 2090-0566 but both return empty information on Keysight's website. It's for the 2090-0574 (LQ9D340H) anyway so that information is not super important. Using Google the 2090-0566 lamp reference we find that the HP-8720D uses it, and that the latter has an LCD with reference 08720-60160. This part number has an image on Keysight website: it's a Sharp LQ... something. Too low resolution, but not an LQ084V1DXX. "2161" can be seen on the back of the panel, and the same number can be found on some LQ9D340 LCDs found on AliExpress. But this number could be a factory number or a date code, so we can't rely on that. For the 5185-3731 we find it's just a "protected supply" number for the 2090-0574 so no progress. What is interesting is that I assumed the 2090-0361 would be older, but this indicates it could be a newer part. Looking that number up on Keysight's website returns many more hits than the 2090-574 or 2090-534. The 2090-0361 is also the display found in the 8753 from the EEVBlog post mentioned above, and that was an LQ9D340H. So I think that indeed 0361 is the newest, and possibly an identical LQ0D40H. In the 4395A manual, the GSP board assorted to the 2090-0361 LCD is the E4970-66551. According to Keysight website, this GSP board was later replaced by E4970-66553, which is only mentioned in the 4294A service manual together with the 2090-0361 LCD. The 4294A was the last surviving instrument of the series that also comprised the 4395A, 4396B, 4352A and 4291A. It was still sold under the Keysight brand and likely has had all the latest hardware updates. In fact its manual does not mention any "manual changes". To summarize:
So what now? Lemme tell you what now... Basically a display upgrade can be done in three different ways:
So in the end, after a year looking for a cheap donnor 4352B, I finally managed to get that instrument and swapped the displays and display boards between the 4352B and the 4396B. The 4396B is now a lot nicer, although it's still an old LCD with limited contrast, luminance and view angle. Still it's a cheap and efficient way to fix the LCD issue, and it is in fact cheaper to get a complete donnor HP-4352B than to buy a second-hand LCD from China! Not a bad deal... For the record here are the two GSP boards, old (E4970-66552) and new (E4970-66554). I can only see three major differences:
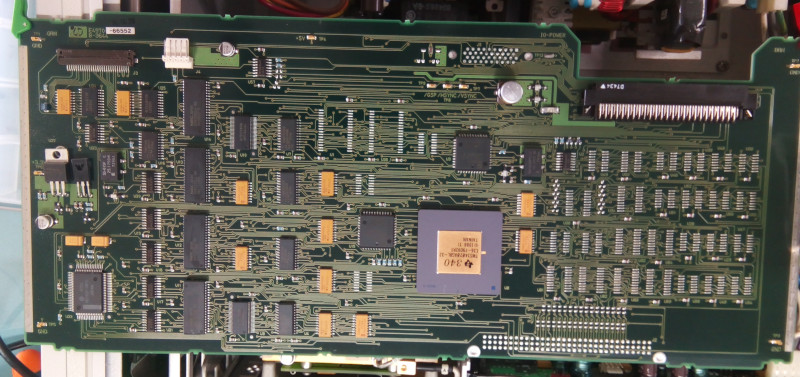 The old GSP board (E4970-66552) 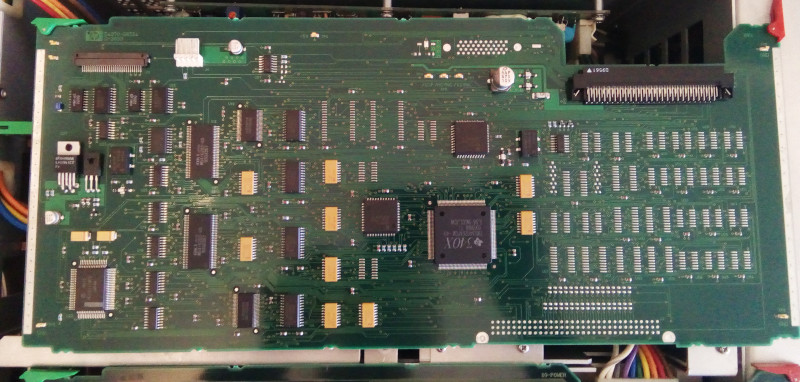 The new GSP board (E4970-66554) Here's a final picture of the 4396B and 4352B after the display swap. The 4396B now has great contrast and nice black background. The 4352B next to it looks a bit sad with its background all blueish, poor contrast and yellows looking rather orange. Overall a great fix for the money, plus reselling parts of the 4352B will let other instruments get a new life and maybe, just maybe, make this entire fix completely free. Great success! 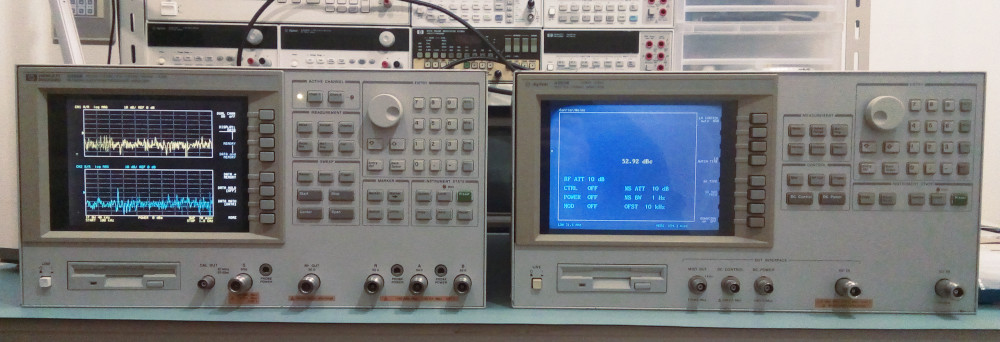 The two dinosaurs after the display swap | |||||||||||||||||||||||||||||||||||||||||||||||||||||||||||||||||||||||||||||||||||||||||||||||||||||||||||||||||||||||||||||||||||||||||||||||||||||||||||||||||||||||||||||||||||||||||||||||||||||||||||||||||||||||||||||||||||||||||||||||||||||||||||||||||||
| © 2024 Damien Douxchamps. All rights reserved. | |||||||||||||||||||||||||||||||||||||||||||||||||||||||||||||||||||||||||||||||||||||||||||||||||||||||||||||||||||||||||||||||||||||||||||||||||||||||||||||||||||||||||||||||||||||||||||||||||||||||||||||||||||||||||||||||||||||||||||||||||||||||||||||||||||