HP-6632A system power supply maintenance and calibration | |
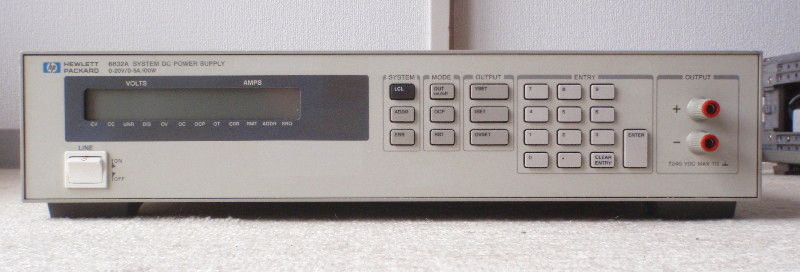 The HP-6632A system power supply Whenever getting something at an auction there's always some uncertainty about what exactly you get for your yuros. Or yen. Or doll hairs. It's a fairly good idea to open the device and check things out, possibly before powering it up. You know the song, "don't turn it on, take it apaaaaart"! The Hewlett-Packard 6632A is a 100W system PSU (20V, 5A). Which means it normally lives its entire life stuck in a rack that runs 24/7. This means a lot of hours on the counter, but those are in general highway miles, not city miles. Unless the device has recent calibration stickers it has probably not been cleaned in "a while" and will likely contain a lot of dust. The fan could also be noisy or dead, as mechanicals are the first to die in this case. Well the fan is noisy alright (yup, powered it up, sorry...) so we'll have to open it anyway. Let's dive in. 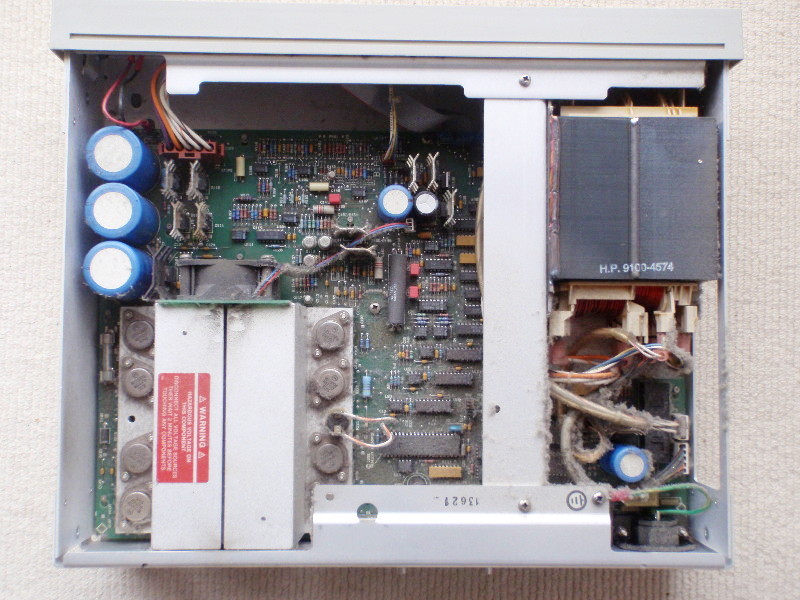 It's open. And as dusty as can be! As expected the device is fairly dusty, especially around its mains area (filter/transformer). This is a common area for dust because 1) high voltage/static attracts dust and 2) it's next to the air flow inlet on the lower right. Classic 3-step process to remove dust in the interior: a) vacuum cleaner then 2) air duster and finally 3) alcohol wipes (IPA). Compulsory before/after: 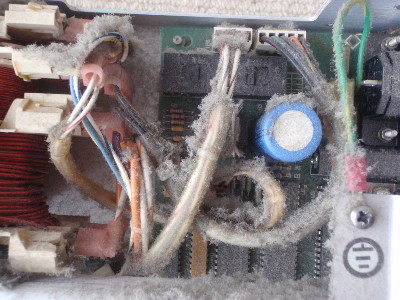 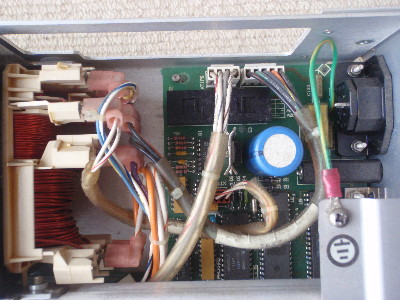 Further cleaning was performed even after that but you get the idea... Everything looks nice, but I did notice some wobbliness in the front connectors. I bought this PSU because it had the front connectors option (a rarity for system PSUs) so fixing them is a priority. Luckily the nuts attaching the connectors are plastic and they just deformed a bit when the connector was hit in its previous life. Unscrewing and re-screwing the nut fixed the issue. Great Success. Next is a capacitor check, something mandatory for any old equipment. My HP-3478A had some pretty damaged mains filter caps from RIFA and this device being from the same era a little look in the mains input area is in order. Sure enough, five RIFA caps can be found and need to be replaced. Three are in the mains filter and two near the GPIB connector: 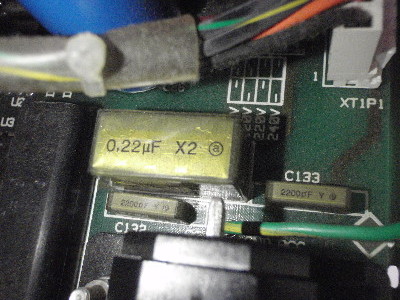 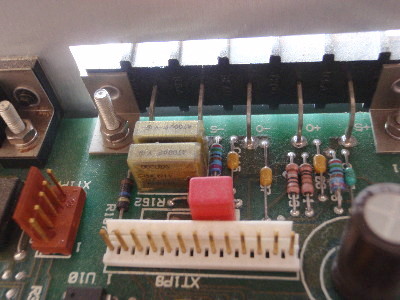 > >Evil caps. None of these gets left behind... Replacing the caps is simple except that the PCB must be removed from the chassis. It's only held by 3-4 screws and can slide easily out, except that the metallic structural rail which is also attached to the transformer is in the way. Removing the rail is not difficult once the screws that attach it to the transformer have been located. Don't forget to remove the hex nuts from the GPIB connector too. After replacing the caps we can have a look at the dead corpses of the old RIFA buggers... 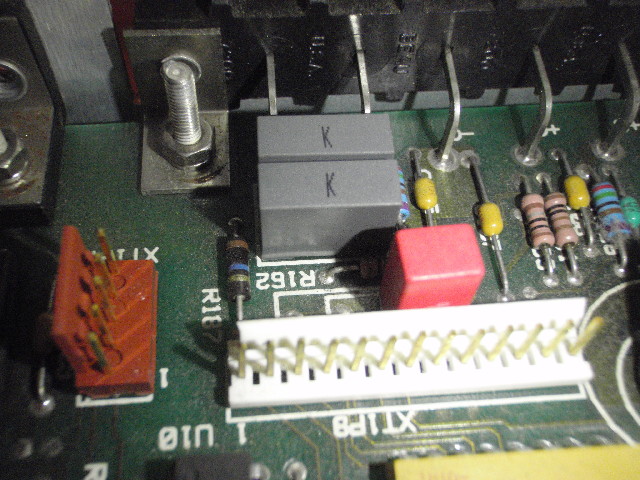 Much better! 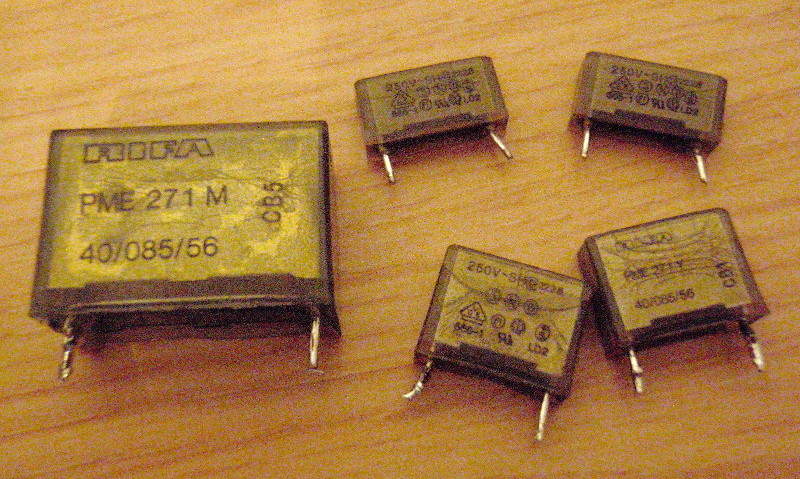 Already cracked and ready to snap and pop... ;-) Lastly the fan must be replaced. I used a slightly less noisy version which is actually still too noisy for me, but I want my CFMs so I guess it'll have to do. CalibrationThe user manual contains a very helpful calibration section (Appendix A), complete with a BASIC calibration program. I brought this program into the 21st century by converting it to python. The voltage calibration works well but the current part is untested: current calibration requires a 0.1 Ohm, 0.05%, 25W resistor that I don't have. Those beasts will burn a 'little' whole in your pocket (think many hundred dollars). Feel free to download the python script and play with it. Although I only tested it with my 6632A it should also work with the 6633A and the 6634A. Feedback is greatly appreciated. One thing about the calibration: your PSU meters will not match the entered (target) voltage/current values exactly, even after calibration. The problem is that the PSU only has a 12bit ADC, so for my 20V 6632A that means 5mV/bit. Hence there will always be a few mV/mA of difference. OCD-types beware! :-) | |
| © 2024 Damien Douxchamps. All rights reserved. | |

