Engine-out operation on the HP-54542A, aka battery replacement | |
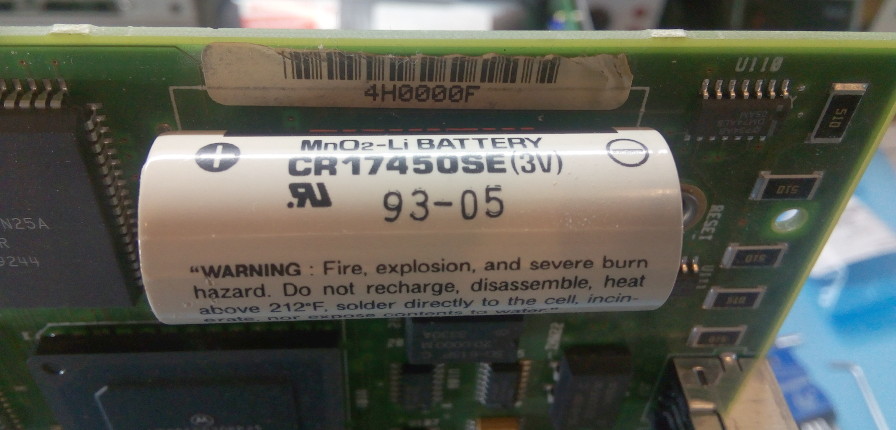 This is a bit old to my taste... Replacing the battery in the HP-54542A is an involved affair, hence the catchy title. As spotted during the onboarding session of this scope, the battery is the original one from 1993 (date code 93-05). This was 19 years ago, double its expected lifetime! Although it's still reading 2.922 volts, the discharge curve of the battery is quite steep and it's likely close to giving up the ghost. To replace the battery we'll need to extract the main board completely. Just like removing the engine of a car, you'll need to disconnect all the cables from the main board before delicately removing it. And it's heavy. Like an engine :-) As for my other 54542A pages, this fix is also valid for other Hewlett-Packard scopes of the same family: the HP-54540A, HP-54520A, HP-54522A, HP-54542C, HP-54540C, HP-54520C and HP-54522C. But first we have to remove the back panel. This is not very complicated, the only catch is to properly disconnect the power button plastic arm. Then disconnect the fan, phase sensor, serial and parallel flat cables, the display board cable, the front panel cable and the 3 coax cables of the rear panel (they are nicely labeled on the PCB, so no issues when putting them back later.) Those PCB-mounted coax are a bit hard to remove (pull hard) but quite pleasant to put back in, with a very positive and satisfying 'snap'. Oh and don't forget the front panel calibration signal coax too! Here it is: 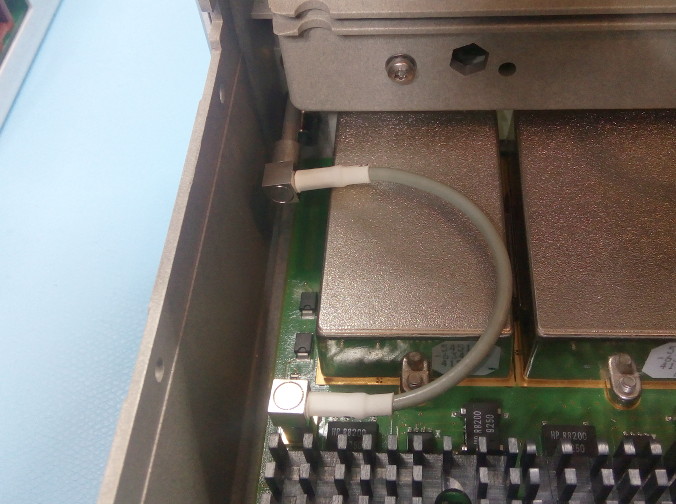 The front coax cable for the probe calibration signal. You know you have a nice piece of equipment when the little probe cal hook of the front panel is connected to the main board using an awesome coax connector. Once everything is disconnected the rear should look like this. Note that the floppy cable is still connected, we'll get to it later. 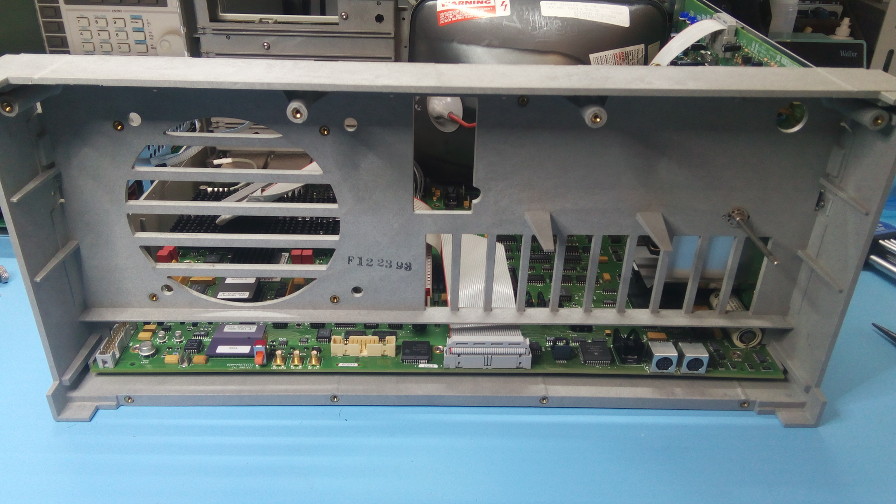 The rear of the HP-54542A when the rear panel is removed. Once all that is sorted you can unscrew the main board. Flip the scope on its size, keeping the input BNC up, and remove the 7 screws located on the bottom side. Then remove the nuts of the 4 front panel BNCs (or 3 if you have a 2-input model). I don't have a BNC-sized socket so I used an adjustable wrench with thin jaws. Still, getting a proper socket is recommended. Here's some pics of that procedure:  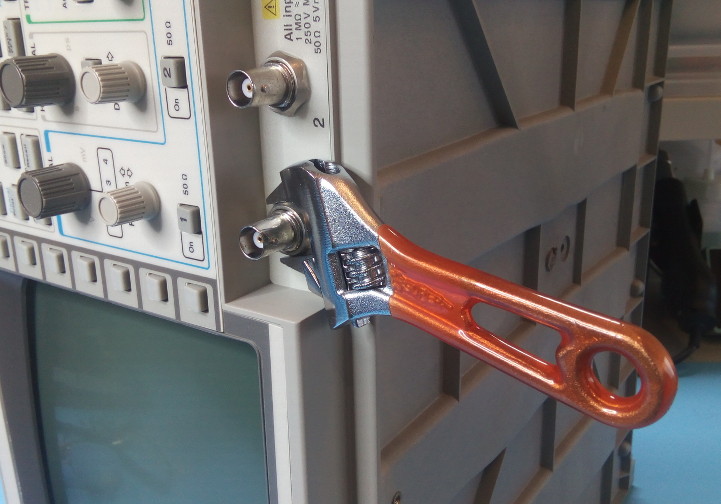 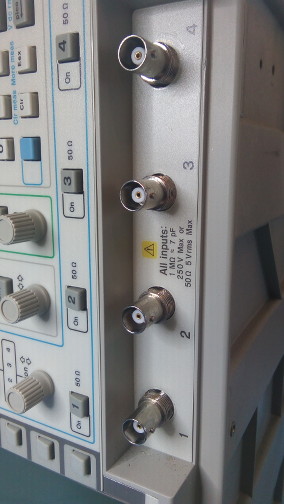 Releasing the main board Finally you can pull the main board. This may feel a bit tight due to the presence of rubber pads on its underside, but it should end up sliding out. When pulling it out, first pull 5-6cm, then disconnect the floppy cable, then pull the board completely out. Note that to replace the battery you may be fine just pulling the board out a little, but I did it completely to admire its bottom side. And it's top side too actually! The battery to be replaced is in the upper left corner. Be careful when manipulating the PCB: it's quite heavy with its front-ends and hybrids. I recommend always holding it from the heavy side.  The bottom side of the HP-54542A PCB 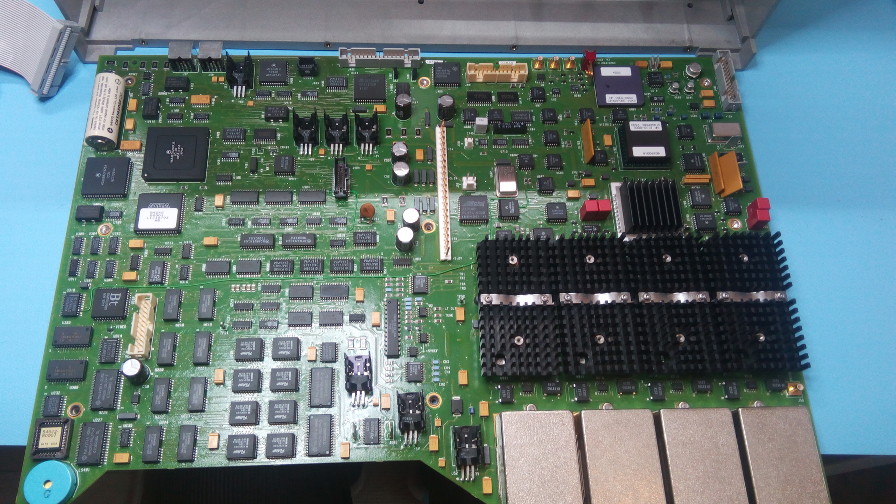 The top side of the HP-54542A PCB It goes without saying that you should use proper static protection when handling the board, and in fact as soon as scope cover is removed. Desk mat + wrist strap are a must. And please, get rid of those magic cordless static wrist bands. They don't work (don't believe me? Maybe NASA can help...). With the board out we have good access to the battery. To desolder it you can first remove the single-pin side (negative), then remove the two-pin side (positive). The PCB is high-quality and the holes are large enough that there should be no risk of stripping the plated holes. But hey, we haven't discussed what to replace it with yet! The battery is a CR17450SE-FT1 from Sanyo. Exact replacements are still available for less than $10, but here in Japan some vendors ask $30 or more, hence a bit of shopping is required. I ended up buying from Monotaro, it was the only reasonably priced vendor. Here's the old and new batteries before replacement. Do check the polarity one more time: the + side should have 2 pins, the - side only one. 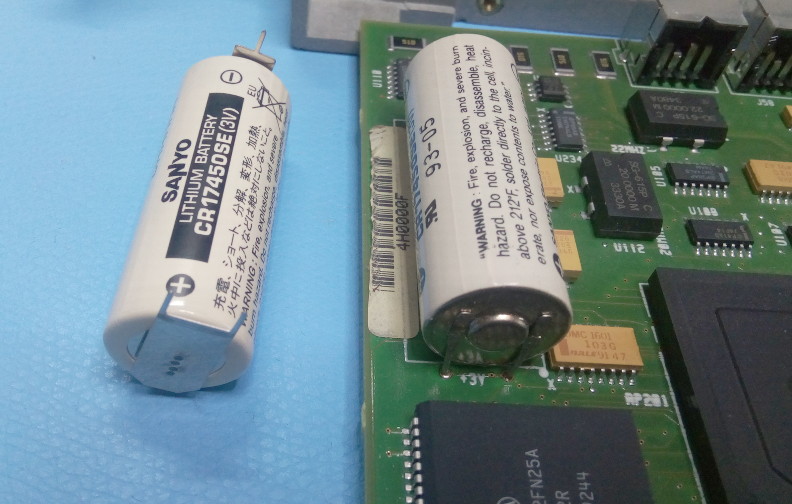 Old (right, on board) and new (left) batteries before replacement. Be sure to verify the polarity! The high-quality PCB does like to keep the solder in its plated holes so my desoldering pump did not work. A good wick did the job perfectly though. Once replaced I recommend you put a date on your battery (the new one did not have a date code on it). And write it where you can see it without removing the board from the scope :-) Once replaced it's just the same procedure but in reverse order: put the board in, leave 5-6cm out, re-attach the floppy cable, insert the board completely in, screw the 7 screws on the bottom side (keep them a bit loose for now), add the nuts to the front panel BNCs and tighten them with the scope in its normal position (bottom panel down), then tighten the bottom screws, re-attach all the cables, reinstall the back panel, etc etc... 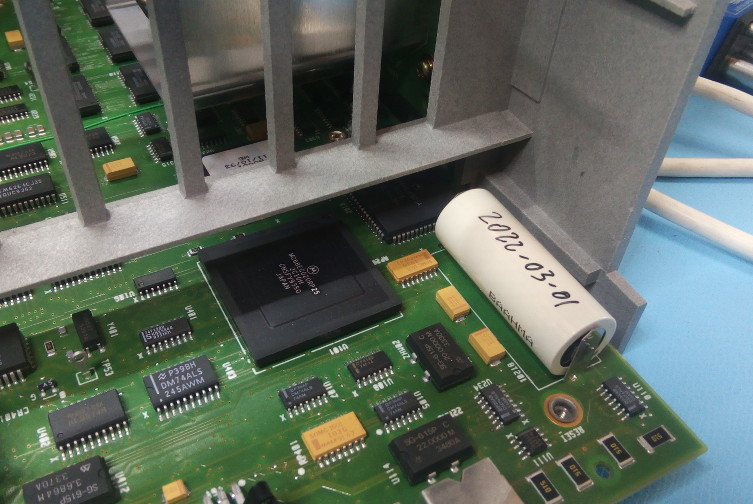 New date code, clearly visible without disassembly This disassembly operation was not the first one: I had removed the PSU a few times already. I had noticed that the floppy cable clip located on the PSU was close to breaking apart, a normal thing when you're attached for years on a heating component. And you're made of plastic. So I had a replacement available when I did this operation. Even though the clip was about to crack, the glue that attached it was still very strong and it was a bit of a pain to remove. Here's a view of the old cracked clip next to the new one: 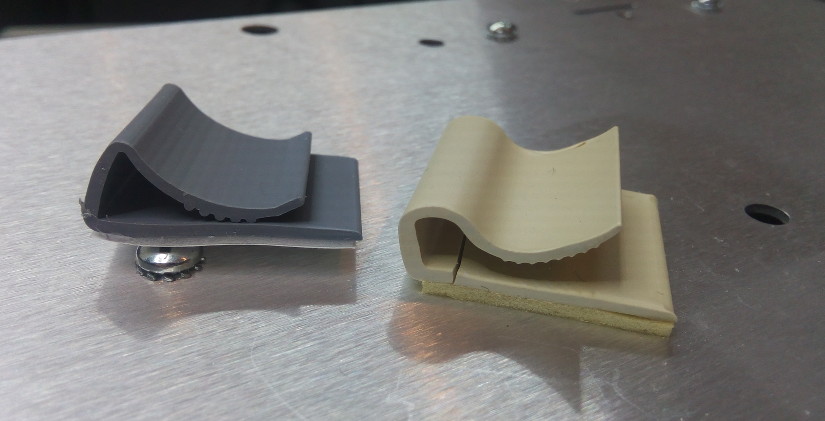 Old and new floppy cable clips Finally, removing the battery means that all your calibration data is lost (as well as settings etc...) Maybe I should have mentioned that at the beginning of this article? ;-) So now you'll have to go through a self-calibration procedure, which can take a bit of time. HP is nice here: no big panic message, just clear instructions on what to do the next time you boot your scope. Although I would agree that "CALIBRATION FACTOR CHECKSUM ERROR" is still a little scary... 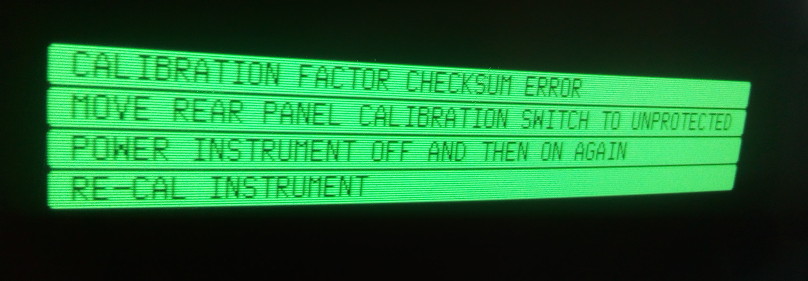 Recalibration required message on next boot One last thing: it may be obvious but removing the battery also clears anything and everything that resides in the battery-backed-up RAM. Recalibration was thus required, but it's not the only thing that must be refreshed: the device serial number is also gone! You can check this by querying for "*IDN?" over the HPIB bus, for example with python and pyVISA:
>>> import pyvisa
>>> gpib = pyvisa.ResourceManager()
>>> scope = gpib.open_resource("GPIB0::7::INSTR")
>>> scope.write("*IDN?")
>>> val=scope.read_raw()
>>> str(val.decode("cp437")).rstrip()
'HEWLETT-PACKARD,54542A,D╕ì\x1aGε@ôîè,00.13,01.14,T3.33,01.01,0.001'
Here I used 7 as the HPIB address of my scope, but you should change that to reflect your setup of course. Also, the 'cp437' decoding is needed here because the serial number is just a random uninitialized binary string that contains something else than simple ASCII characters. I pestered for months about that serial being gone and thought that the hardware procedure needed to be improved, for example by using a temporary battery when the lithium is removed. I should have known better: HP is HP, and of course there's a solution! Looking at the service manual I found that a command exists to rewrite the serial number: ":SERial". How convenient! Two things though:
Thus, changing the serial number is now as simple as executing this python line:
>>> scope.write(":SERIAL \"1234A56789\"")
Obviously you want to use your serial number in the command above. After that the 'cp437' mumbo-jumbo is not required any more and you can query the IDN string normally:
>>> scope.query("*IDN?")
'HEWLETT-PACKARD,54542A,1234A56789,00.13,01.14,T3.33,01.01,0.001\n'
Your serial number should now be in the IDN string. Bingo! All that's left is to put the cal protection switch back to its protected position and the job is done. So there you have it, now you don't have to be ashamed when hanging out with your grease-monkey friends: we angry-pixies lovers can also do engine-out jobs! And for those who like videos, checkout this one which talks about this exact subject. | |
| © 2024 Damien Douxchamps. All rights reserved. | |

