HP-3325B Synthesized Function Generator repair | |
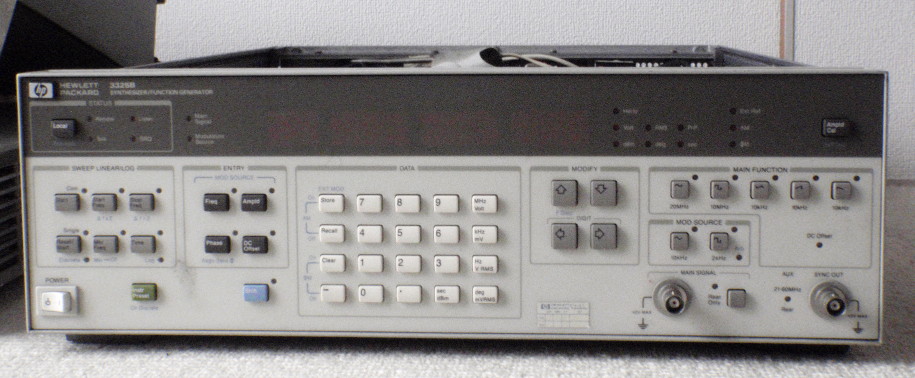 The HP-3325B Synthesized Function Generator I bought a non-functioning Hewlett-Packard 3325B at an auction, and that means repair time! Here's how I did it, I hope this can help another soul... The device came without any accessory or manual, but that's not a big deal since most manuals are available online. The service manual I found was quite poorly scanned (it dates back from the late 80s after all) and parts references and values were pretty hard to read. But it wasn't a big deal after all as the problem did not involve too much black magic. 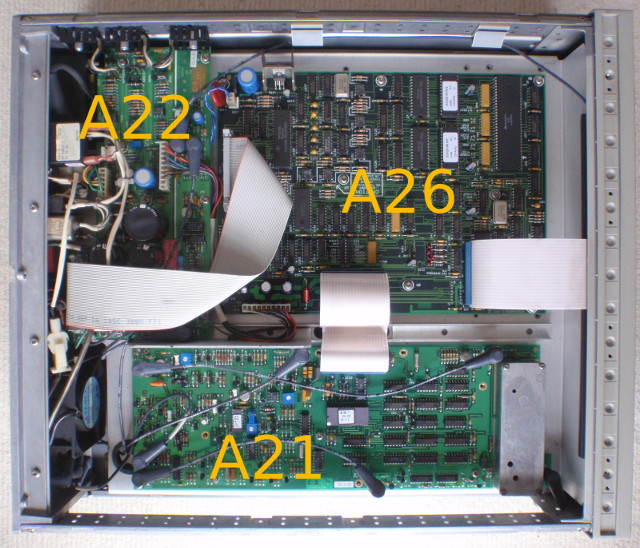 Top view of the innards of the HP-3325B with the 3 boards we're interested in: A21, A22 and A26. Obviously the first check to be performed is the fuse: you'd be surprised how many 'dead' instruments just need this little part to be changed. But no luck this time: the fuse was OK. The first time I powered the device the transformer was a little noisy (which can indicate a large current draw) so that was a concern. It could also point to a dead transformer, which would be a real pain. The fan was also not spinning, but at least it was trying to so the power supply was not completely dead (rather, the fan was dead). The fan will need to be replaced but this can wait. 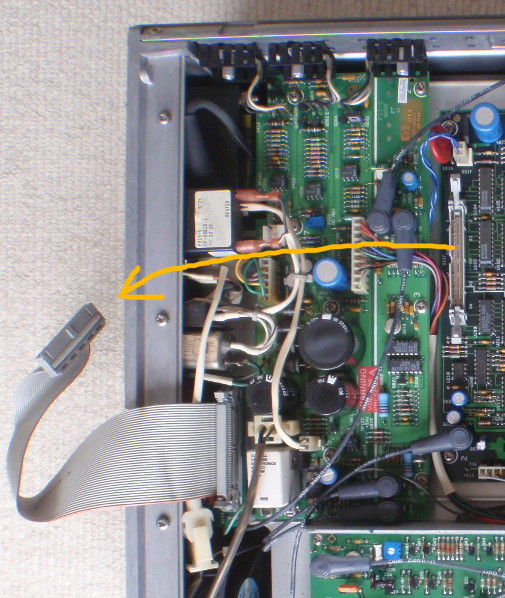 Disconnecting the HPIB cable that's in the way. On to the power supply board then (assembly A22). First I removed the HPIB cable that's on the way: we won't be needing that anytime soon. The power supply not being completely dead is actually a little bummer: that's another fix that is usually rather simple. But the voltages on the PSU output connector were very wrong: instead of +5, -15 and +15V I observed 0.5, -3 and +1V. Not gut. 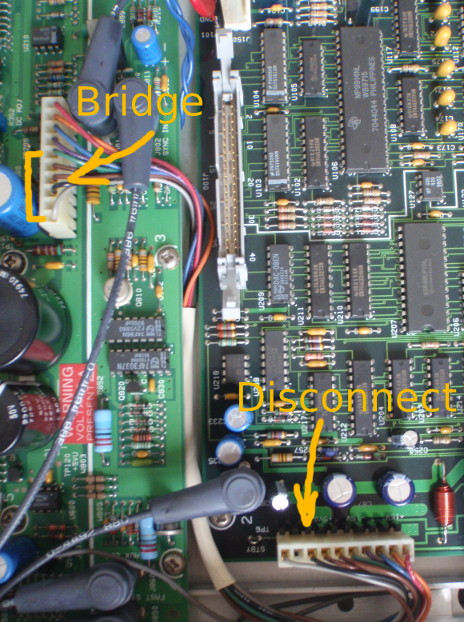 Temporary PSU disconnection and bridge At this point having a look in the service manual is probably a good idea. First thing to do: disconnect the PSU from the rest of the boards, which is done by disconnecting the single power connector of the PSU. In order for the PSU to start without those connections a bridge needs to be made between the power-on wire and the ground (the gray and green wires, respectively). Powering the unit again the voltages are now all good, so the PSU is just fine and the problem is elsewhere. Given the big drop in voltages observed when the PSU is connected to the rest of the system it's obvious that a pretty big problem lies somewhere in all those boards for all the rails to be bad. Probably a short circuit or two between a power rail and the ground. 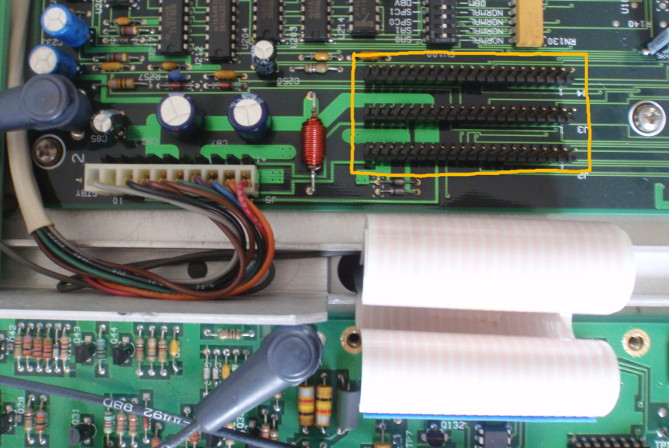 Disconnecting the sub-assemblies flat flex cables. The manual suggests disconnecting all the ribbon cables that connect to the assembly A26, after removing the bridge and reconnecting the PSU cable of course. There's 4 cables: one for the front panel and a group of 3 for the other boards. One can then reconnect them one by one, and see which one kills the power rails when connected. In my case this indicated that the bad board was A21. After disconnecting the power a little investigation work with the continuity tester quickly indicates that the -15V line is indeed shorted to ground. The service manual mentions that the +5 and +15V rails are referenced to the -15V rail, so it's not surprising that if the -15V rail is shorted then all the rails will be NFG. 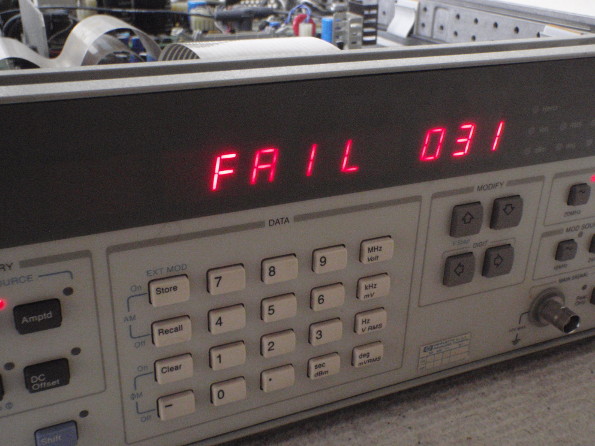 It's alive but a little sick... When all connections are made except for the A21 board, then the front panel lights up! It is alive! Sick but alive. Very sick: many failures are reported. But this is normal as we have effectively removed an entire board from the system.  The FNA part of the A21 assembly/board. The problem is somewhere in this mess. The A21 board contains three things: the "N-counter", the "Fractional N-Analog" (FNA) and the VCO. It's somewehat obvious where they are on the board: one part is mostly digital, another one mostly discrete/analog, and the last one is an RF can. Of course the service manual shows where's what. For those who wonder what 'Fractional N' and friends means, check out this most awesome video from Curious Marc that explains exactly that on the very very similar HP3325A. Looking at that video I'm actually surprised to see that only the digital board seems to have evolved between the A and B version. Since the A version dates back from the 70s and the B version was sold well in the 90s, that's a longevity of a good 20 years! 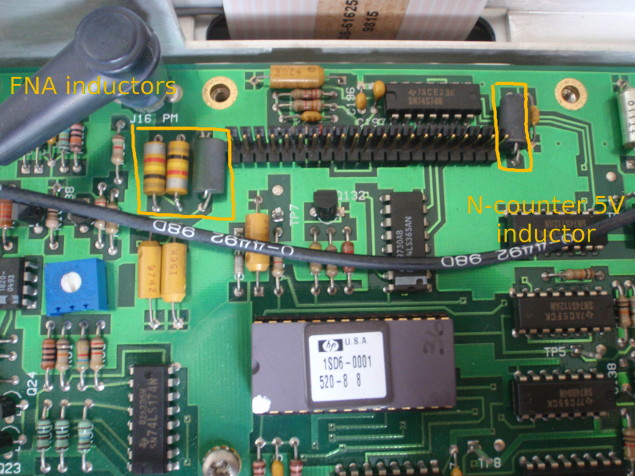 The 4 inductors that convey power to the various parts of the A21 board. But where is the short? A short on a power rail means you can't really look for the short: the rail is obviously shorted to ground everywhere! So isolating the problem is... the problem. A first neat thing is that the -15V rail is almost exclusively used for the FNA part, so cutting/isolating that part from the rest is the first thing to do. Luckily the power rails are separated between the N-Counter and the FNA parts, and each section has its own little series inductor on the power line. This means we can disconnect just the -15V power of the FNA by simply cutting off the lead of one inductor. Easy to resolder later anyway. With that done and all cables reconnected we can boot the 3325 and... it's still alive, still sick, but there's less errors shown on the display (the VCO and N-Counter are now connected). Progress! 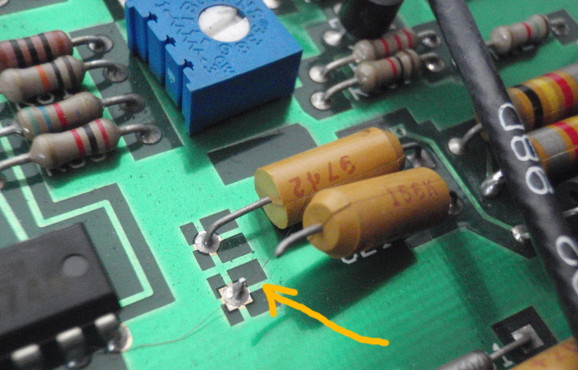 I'm gonna cut your leg off and $#%@ down your neck: the shorted tantalum cap is disconnected. Now we have to find where in the FNA -15V rail is that bloody short circuit. There was no obvious part in the schematic that could short the -15V to the ground: there's always some resistor in the paths of transistors, etc... What do? I unscrewed the board from the 3325 and located all the PCB traces for -15V. Then the evil (but very effective) plan started: cutting traces here and there, like cutting the branches of a tree, until the short is gone. That would indicate in which part the issue is. After 40 minutes of cutting with an exacto knife and testing (6 cuts total), the short was still there. WTF? All traces were cut, but the short was still there! Impossible... Well, it took me another good 10 minutes to realize the elephant on the circuit was one part that was not cut off the rest: the capacitor right next to the inductor. Doh! Looking at the parts list in the service manual this capacitor is, you may have guessed it, of the tantalum variety. You know, the one that is prone to failure. Cutting one of its legs off (ouch!) removed the short. Hurrah! Now I had to do a bit more surgery to fix all the little cuts I made on the -15V rail. That involves scraping off the green resist layer with the exacto knife and making a little solder bridge. Clean and simple. The -15V rail inductor also needed to be reconnected. 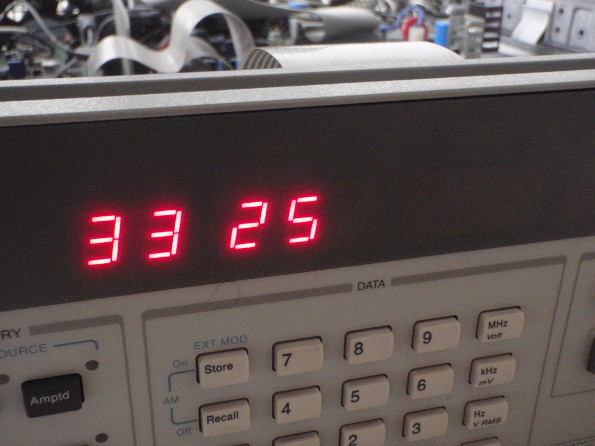 Progress! At this point the moment of truth: power on and... "3325" displayed on the front panel! No failure codes! Banzai! It vvvvorks! Or at least it looks like it does, but this is confirmed by checking the output on the scope: all signals are OK. I haven't tested all the functionalities of the 3325B; heck at this point I don't even know what all those are. But all waveforms are good, frequencies/voltages are fine too (frequencies from 1uHz to 21MHz, though I did not wait 5 days to check if the 1uHz output was fine). 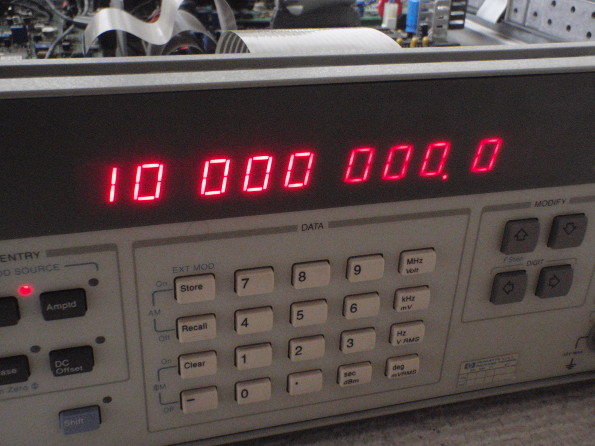 Welcome back little (?) 3325B... Tantalum caps are a real pain for so many devices, from this more obscure 3325B to the most beloved and famous 34401A. The service manual helpfully lists all the caps and indicates the tantalum ones with a "TA", so a little visit to Digikey is now on the menu to replace all of them with ceramic ones. Electrolytics would be fine too I suppose, but those also have their bad habits which often include explosions and/or leakage. The caps to be bought are located on assemblies (boards) A3, A14, A15, A21, A22 and A26. There's also 2 caps on A8, but I don't have that optional board in my device.
Since Digikey doesn't have 27uF I'll replace those with 33uF instead. The 15uF are also not available, so they will become 22uF's. This is actually a good thing since the caps I found have a 20% tolerance and the service manual asks for 10. So a little bit of extra capacitance in those will not hurt. I suspect all the decoupling caps could be 33uF's, but I'll stick to the original values as much as possible to keep the cost down. I was surprised to see the prices of those ceramics... In total this is a whopping 25 euros just for the capacitors. Quite a few (10) are hidden on the front panel board and must also be mercilessly replaced. It takes a little effort to isolate the front panel but nothing special, and then the carnage can start... 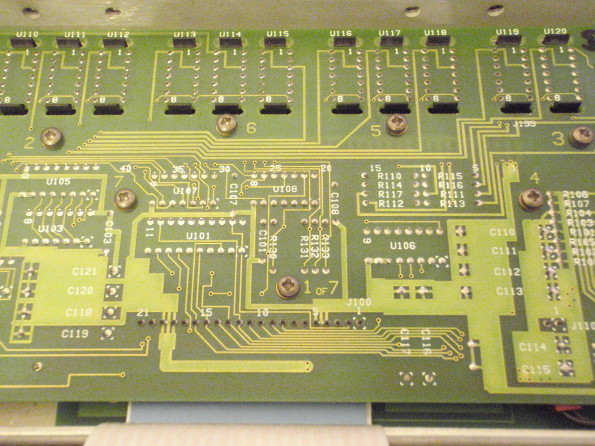 Isolated front panel assembly 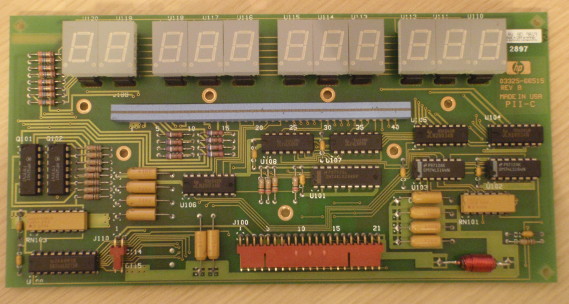 Unscrewed and flipped PCB. Note the zebra strips that connect the keyboard and LEDs: don't mess with those! 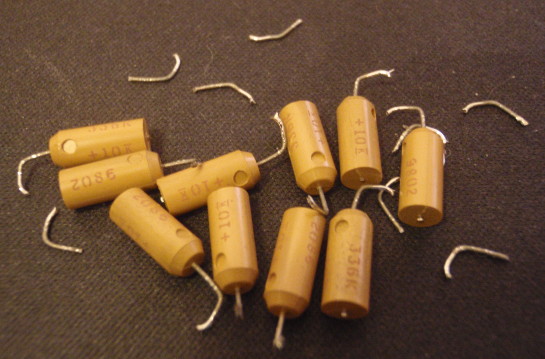 Removed tantalum caps. 10 just for the front panel... The original fan is a 80x80x38mm jobbie and costs about 12 euros. I replaced it with a slightly different one that has a little lower CFM rating but is quieter. Job done! Using a shared 10MHz reference my frequency counter gives me all 11 of the 3325B's digits correctly, and estimates the standard variation of the frequency to 33uHz at 10MHz. Noice! Feedback from readersTobias Bonetti sent me this interesting pic of a failure in his 3325b: another tantalum cap carnage! This one definitely let the magic smoke out: 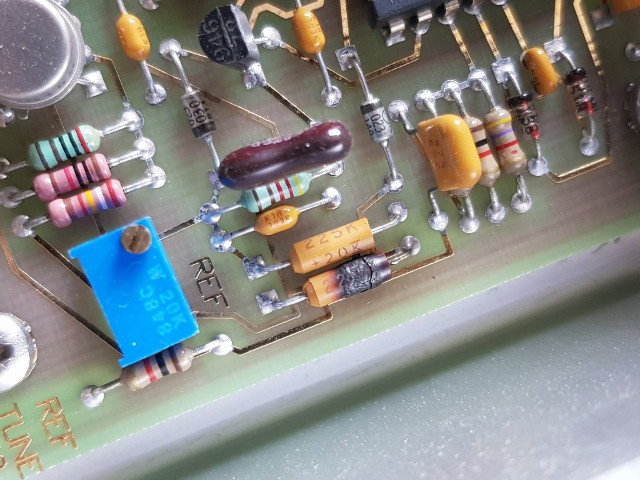 | |
| © 2024 Damien Douxchamps. All rights reserved. | |

